Since I have moved into my Erin Condren A5 LifePlanner Ring Agenda, I’ve wanted to dress her up a bit. Please don’t ask me how much I’ve spent watching youtube videos for ring planners. It’s obscene. But I’ve been sucked into all the options for personalizing my planner. It has seriously opened up a whole new planner world for me. I experienced a planner funk during the pandemic (it’s been refreshing to learn that many of you have as well), and I have new enthusiasm and inspiration for planning.
There are so many cute shops that provide accessories for ring planners. I’ve really loved spending hours browsing Pepper & Jax, Cloth & Paper, Avant Agenda, Paper Panduh, and more. I think my planning style is changing, and I can’t wait to see where it ends in a few months. I wanted to collect some cute dashboards, charms, and cards to enhance my planner to celebrate that change. So I thought — why not make some of my own?
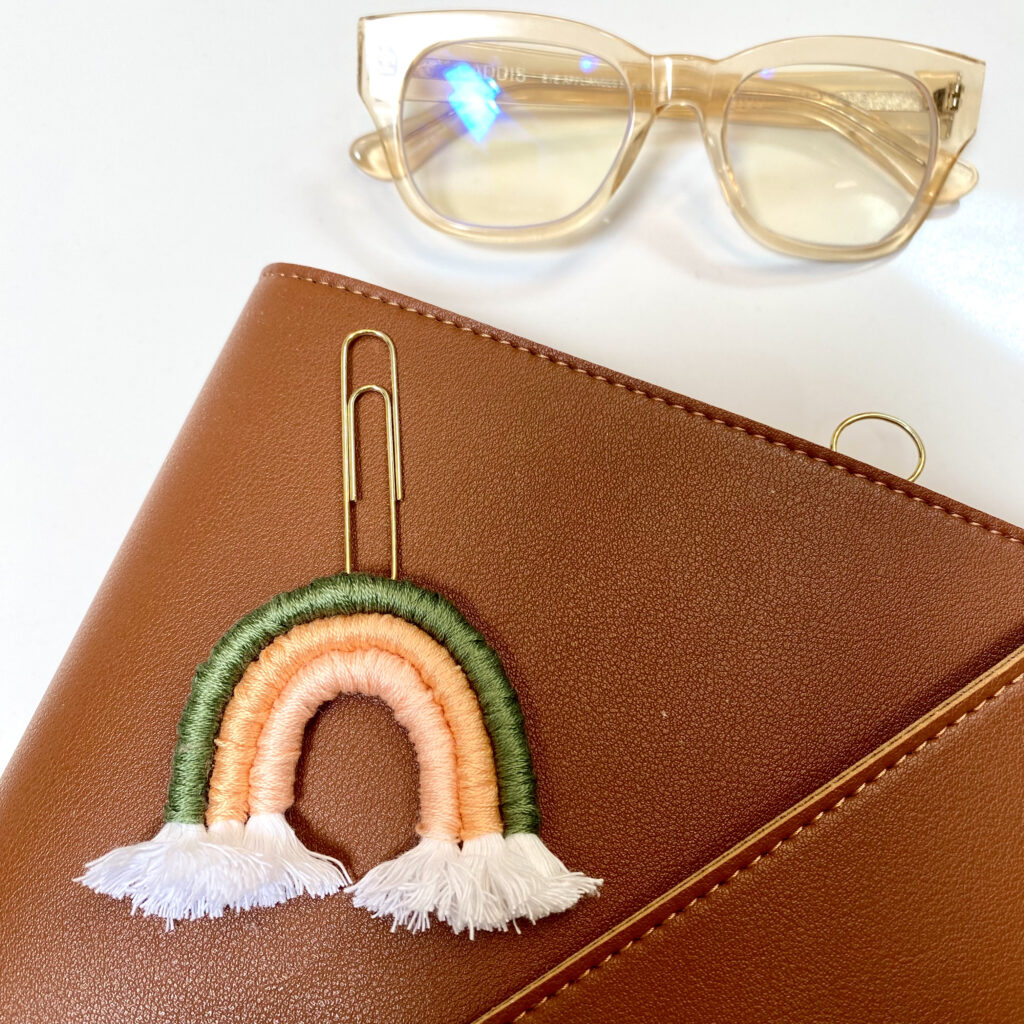
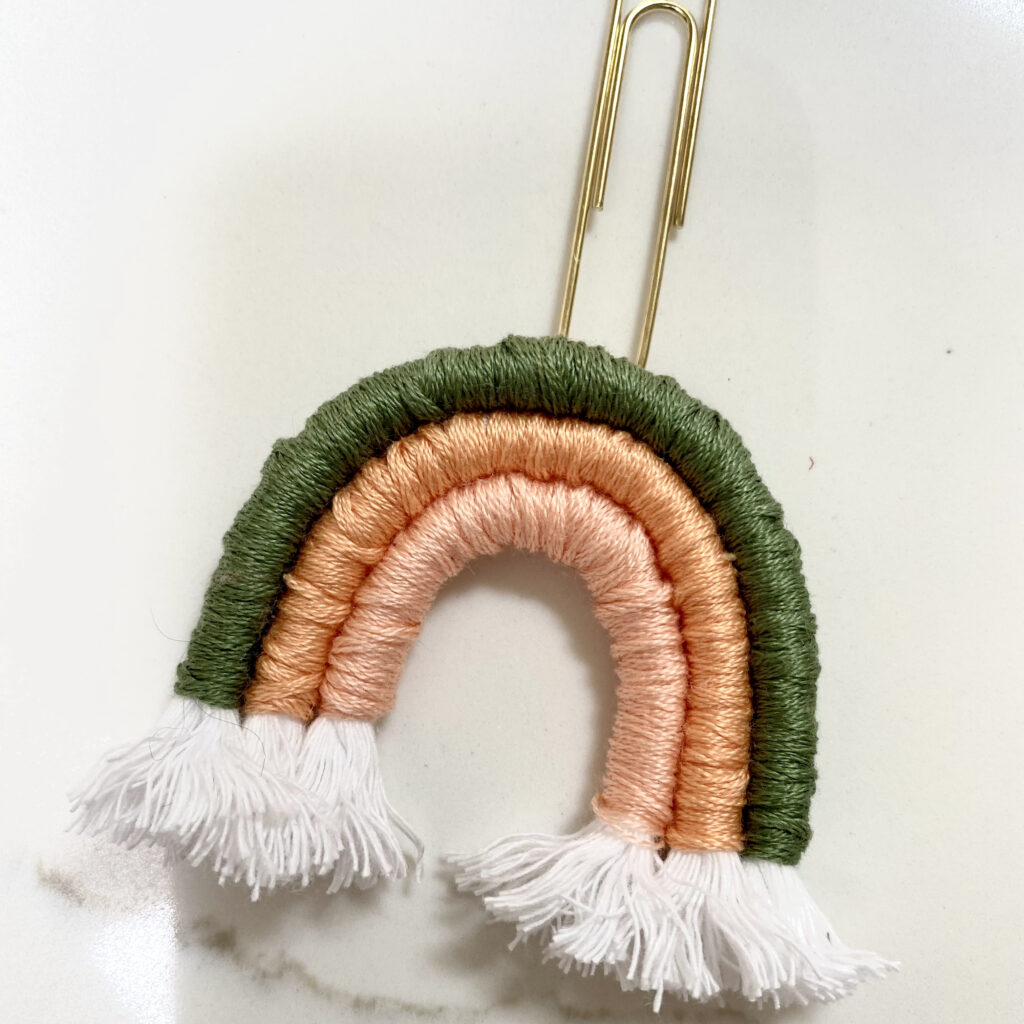
I’ve seen tutorials for these cute fluffy clouds as wall hangings, earrings, and other decorative pieces. So I thought they would make a super cute planner charm. In addition, I’ve been looking at these shades of peach and green for my upcoming August spread. I loved the way this turned out — it just makes me smile. And best of all? It’s super easy to make.
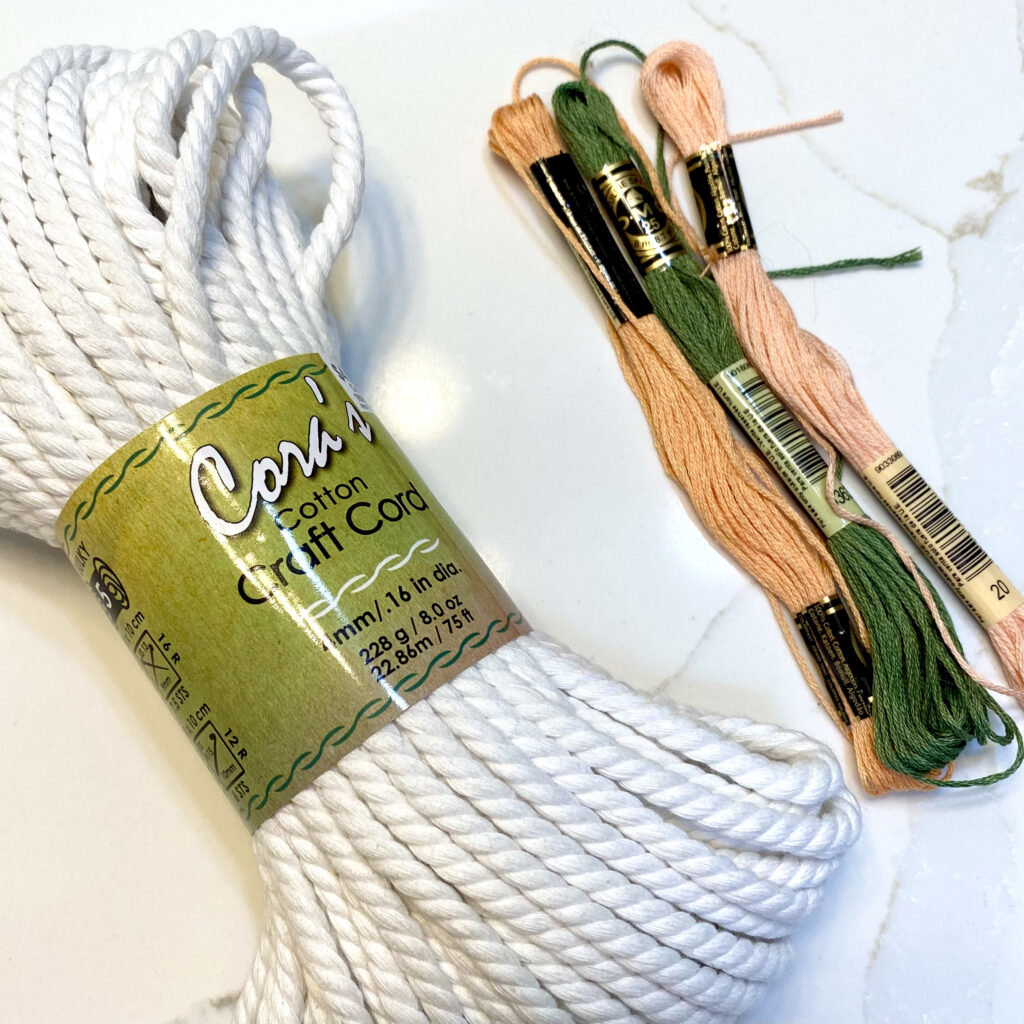
The supply list is pretty simple. You might even have most of it laying around the house:
- Cording (I used Cora’s Cotton Craft Cord in white)
- Embroidery floss (one shade for each ray on the rainbow)
- Needle
- Glue (I used Gorilla Super Glue – this stuff is the bomb)
- Sharp Scizzors
The instructions are pretty easy as well:
- Cut your cord to the appropriate lengths. I cut three segments and then bent them in the rainbow shape that I liked before trimming them to the same length across at the bottom. I also left them a bit long so that I could trim to my preferred length at the very end.
- Tie off the embroidery floss to one end of the cord where you want the colored part to begin. Wrap each cord with the desired color of embroidery floss. Try to keep the wraps even and not overlap, keeping the wraps tight and even. I could have done a better job doing this, but I also think the uneven wrap gives it a cute organic look which doesn’t bother me.
- Continue wrapping until the desired point at the end of your colored ray. Using a needle, tie off the embroidery thread by catching two or three of the previously wrapped threads and form a small knot that will rest on the back of the ray.
- I was constantly bending each ray to test that I was ending my wrap in the appropriate place and adjusting accordingly.
- After all your cords have been wrapped, line up each ray and bend to the degree you like. Remove all but the first (bottom) ray and dot with glue around the sides. Make sure the dots are placed more toward the back of the side so that none squeezes about between the rays on the front. Press firmly together with the desired bend of the rainbow. I used super glue, which really secured each ray together and made it overall very firm and secure. Continue with all your rays until you have completed your entire rainbow.
- Do a final trim of the bottom cord/end of the rainbow.
- Take a piece of embroidery thread and sew your rainbow at the top to a paperclip, claw clip or some other accessory in your planner. I used a paperclip so I could decorate the pockets inside my A5 ring planner.
- Enjoy!
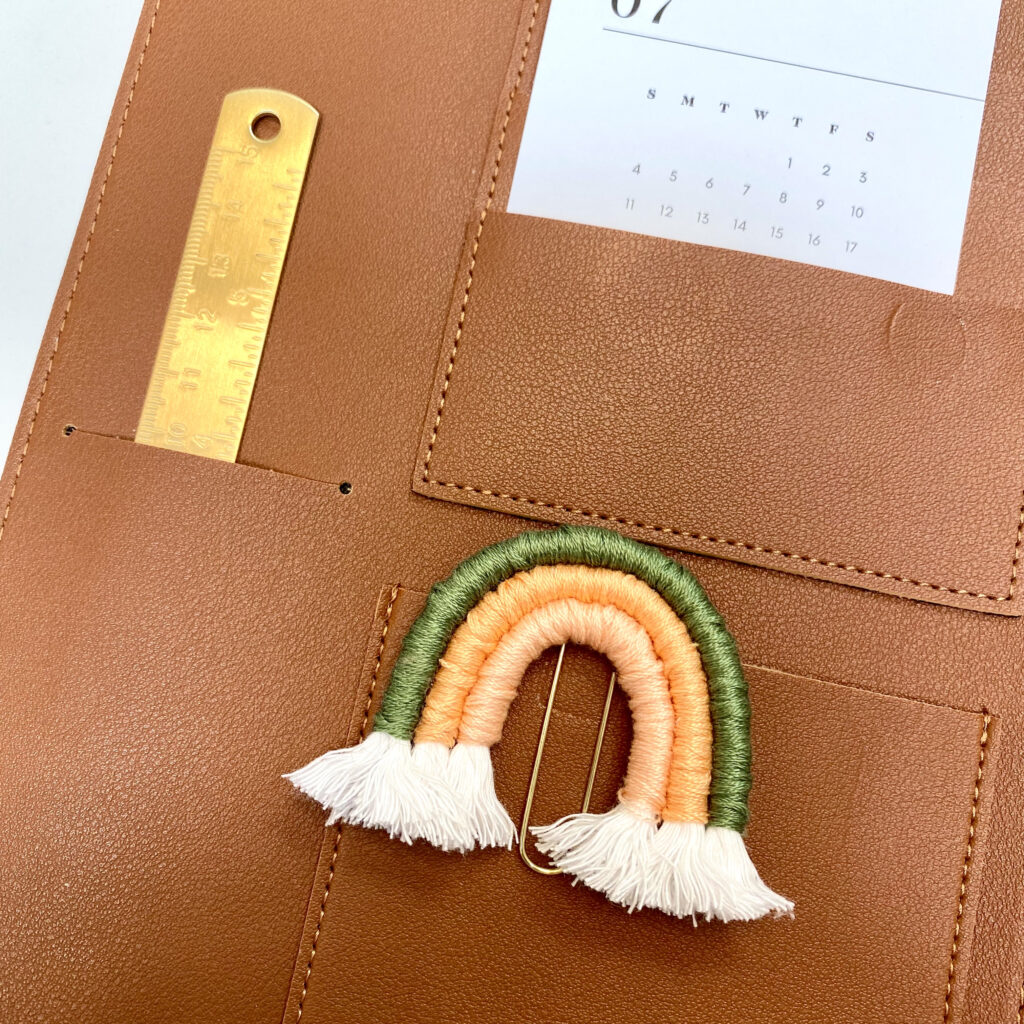
This was so easy to make and made me smile when I open my planner. Plus, it’s going to coordinate with my August spreads. Join me in my August Plan with Me to see this little beauty featured!