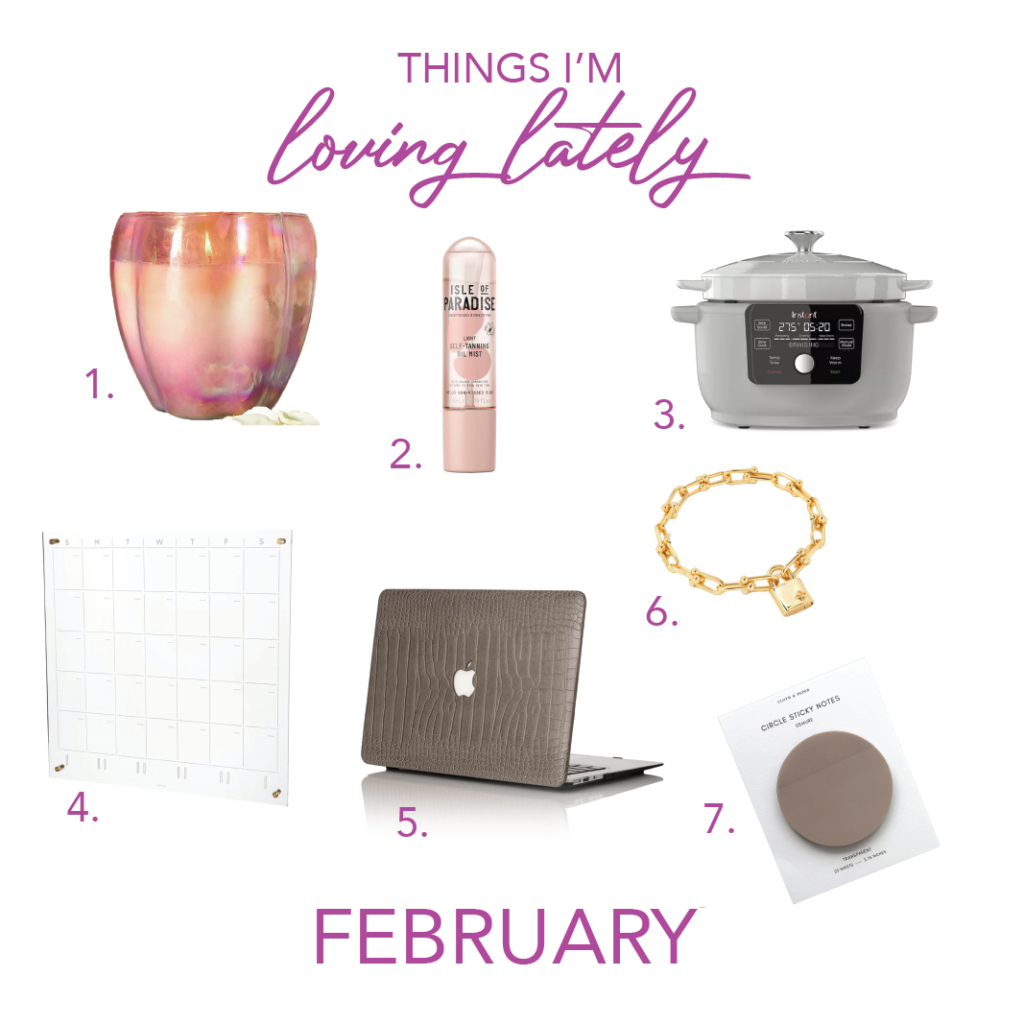
Calias Candle from Anthropologie. I love this candle. I was needing a new home fragrance scent after the holidays. I go all in for balsam and spicy scents around Christmas and had been using them up in January. I’m ready for spring and this Night Gardenia scent is perfect. The fruity floral notes include tropical breezes infused with fragrant gardenia, salted guava fruit, soft tonka, and warm musk. The size medium (shown) has an 81-hour burn time, which will get me through until it really feels like spring outside.
Isle of Paradise Tanning Water. I was recently shopping at Sephora with one of my daughters who pointed out this tanning spray. I decided to give it a try as I have a trip to Scottsdale coming up next month. After just one use I could completely see results. It’s easy to spray on (no mess on your hands) and gives you a nice bronze glow. And the best thing (besides no skin damage) is there is no transfer on your sheets.
Instant Dutch Oven Slow Cooker from Williams Sonoma. I got this as a Christmas gift and I’ve really grown to love it. It’s a combination of cooking in a cast iron Dutch oven with the speed and ease of the Instant Pot. This exceptionally versatile machine features an enameled cast-iron inner pot that lets you braise, slow cook, sear, sauté and warm food – in the unit, in the oven, or on the stove.
Acrylic Monthly Calendar by Russell & Hazel. This calendar is a great way to have a stylish at-a-glance look at your monthly plans. It’s attractive and has accessories to hold pens, stickers and washi as part of their rail system. I’ll try to do a review on this soon. I think you’ll love it as much as I do.
Faux Crocodile MacBook Caseby ChicGeek. This stylish case is crafted with durable rubberized plastic and PU leather for maximum protection from bumps, scratches, and everyday wear and tear. The two-piece design easily snaps on and off your MacBook. The Grayson color of Faux Crocodile material has a beautiful pearl-like finish and luxurious texture. The Apple cut-out allows the logo to shine. I’m just waiting for the matching iPad cover to come back in stock. Fingers crossed it will be on my March favorites list!
Jess Lock Chain bracelet by Kendra Scott. I bought this sweet little bracelet for my twin daughters for Valentine’s Day. It’s so cute and the little lock works as the clasp. This timeless accessory can be dressed up or down and is a new favorite of my girls. Kendra Scott jewelry makes such a great gift for them. It’s always a quality item and craftsmanship but not so expensive that it breaks the bank.
Transparent Circle Sticky Notes by Cloth and Paper. It’s hard to pick my favorite at Cloth and Paper because its aesthetic is just so beautiful. But these Circle Sticky Notes are a go-to for me in my planner and are now on my Acrylic Monthly Calendar (above). The 2.75-inch size perfectly fills the squares for important monthly dates.
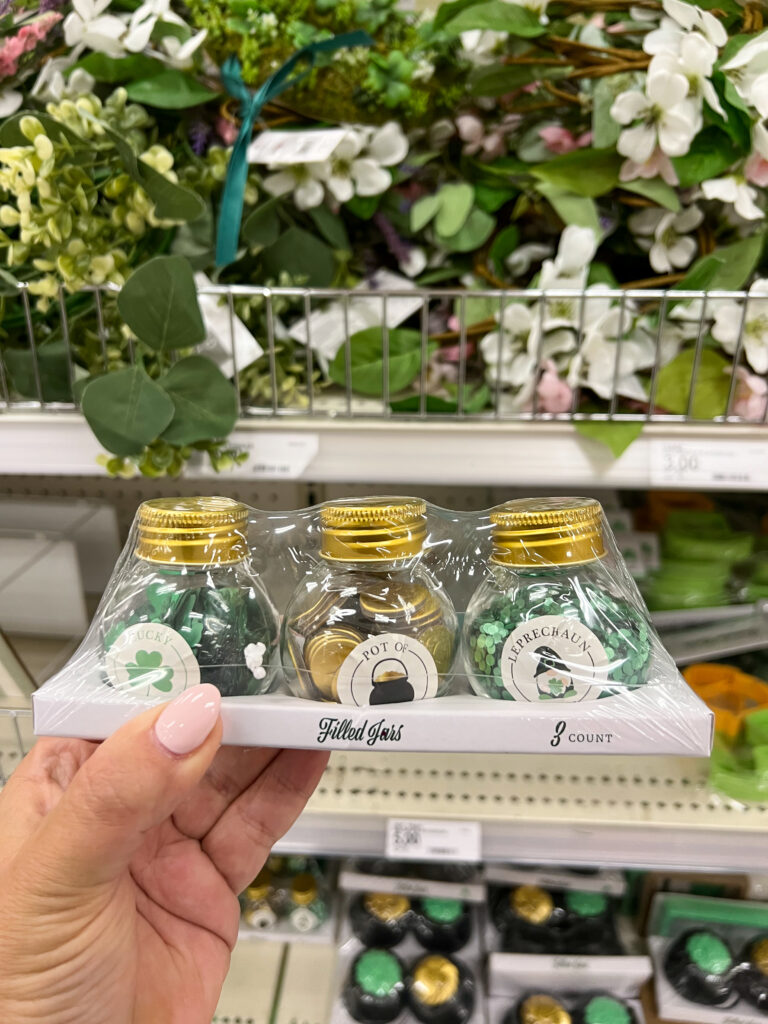
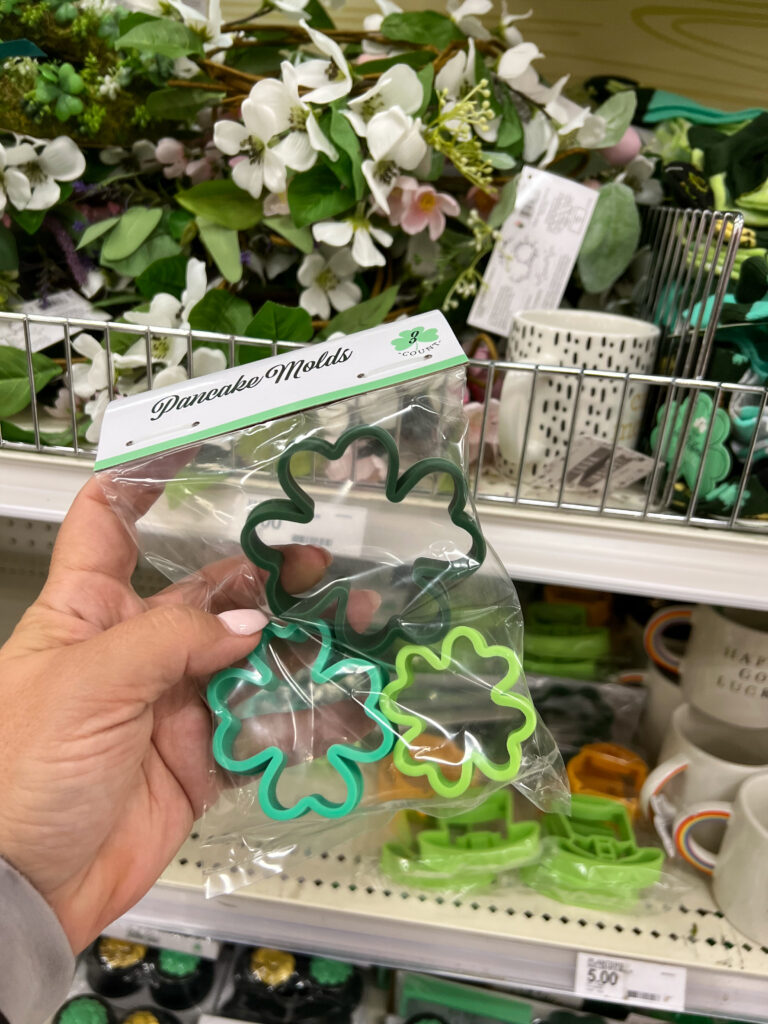
So many cute things for St. Patrick’s Day in Target’s Bullseye’s Playground – aka the Dollar Spot. They are great ideas for gifts, decorations and parties. Check it out early because as you know the good stuff goes fast!
I’ve always loved St. Patrick’s Day ever since we moved in across the street from my very Irish Catholic auntie Mo. She wasn’t my real aunt, but my mother’s best friend. But she celebrated St. Patrick’s Day like no other. One year she made green felt clovers for me and her two daughters to wear on our skirts at school. I loved them and have always tried to create some fun ways for my own daughters to celebrate the holiday.
But back to Target. I picked up these cute three jars of confetti. I thought it would make cute table scatter for a St. Paddy’s day breakfast or lunch. Plus the little jars are adorable and would look cute in a tiered tray or on a buffet.
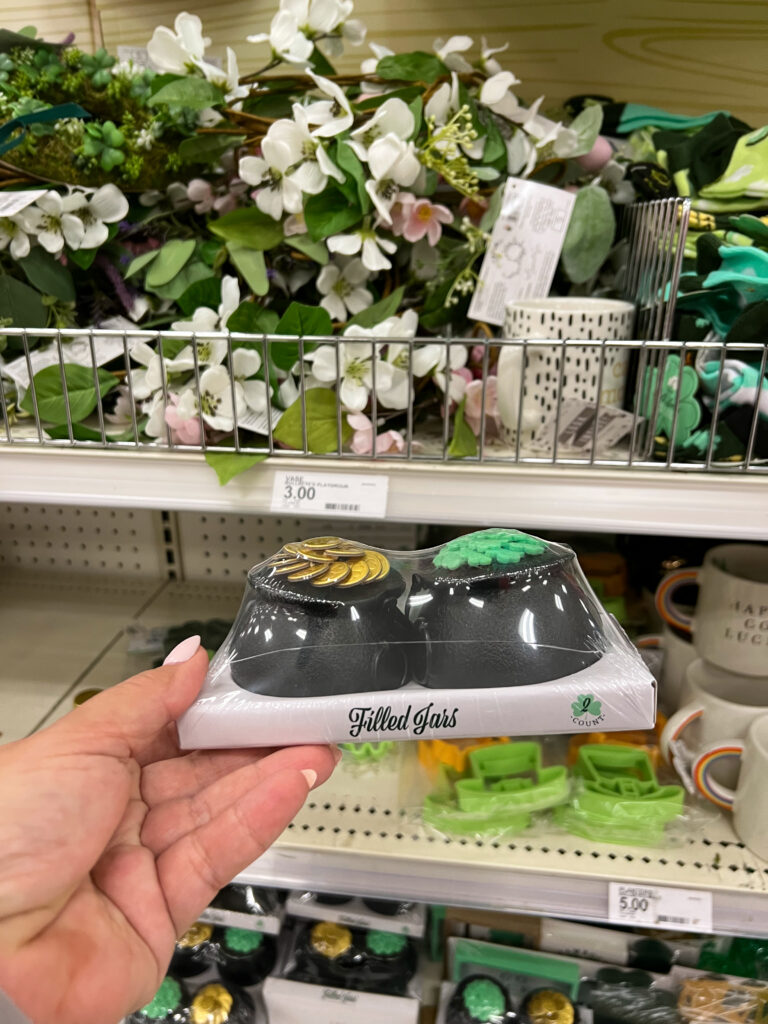
They also had these cute black pots of lucky clovers and gold coins. Again, these would look so cute on a table or buffet.
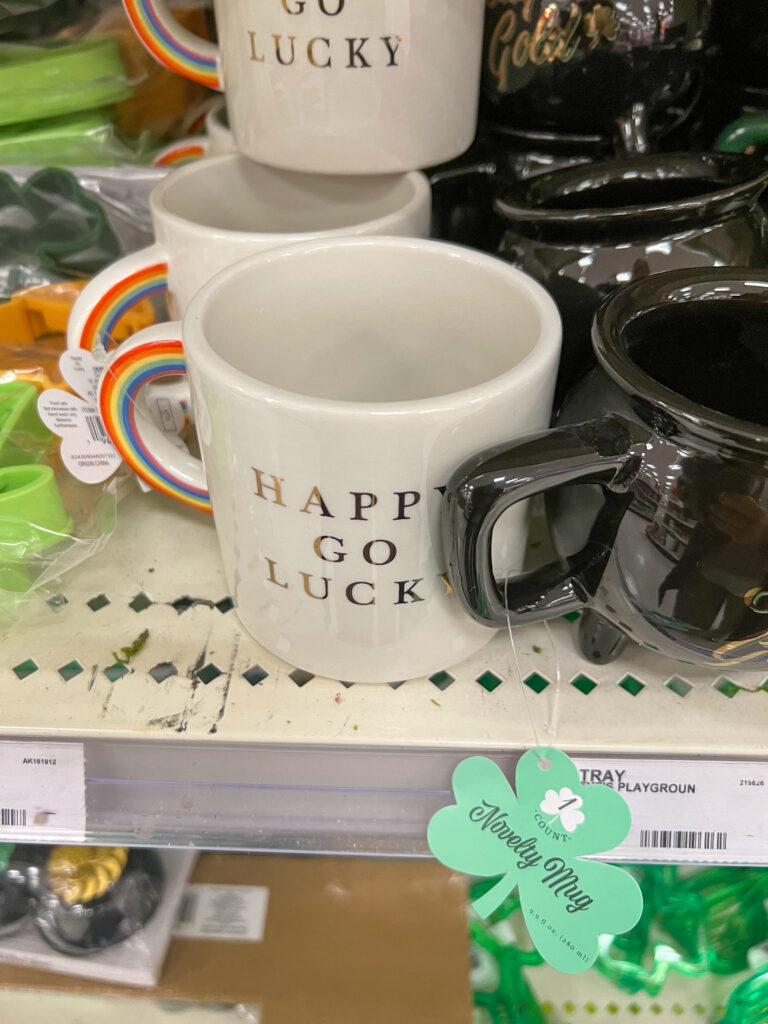
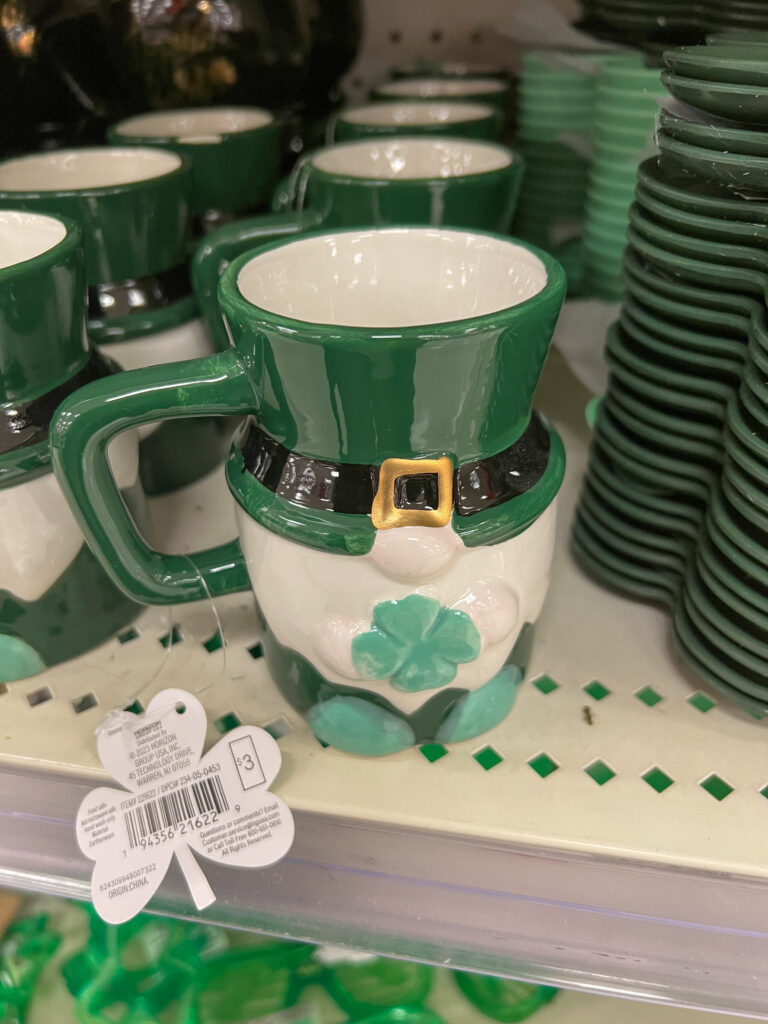
They also have several mug selections. A cute white Happy Go Lucky mug with a rainbow handle, a black Pot of Gold mug and the cutest St. Paddy’s gnome. They would make adorable teacher’s gifts filled with chocolate coins or green candy.
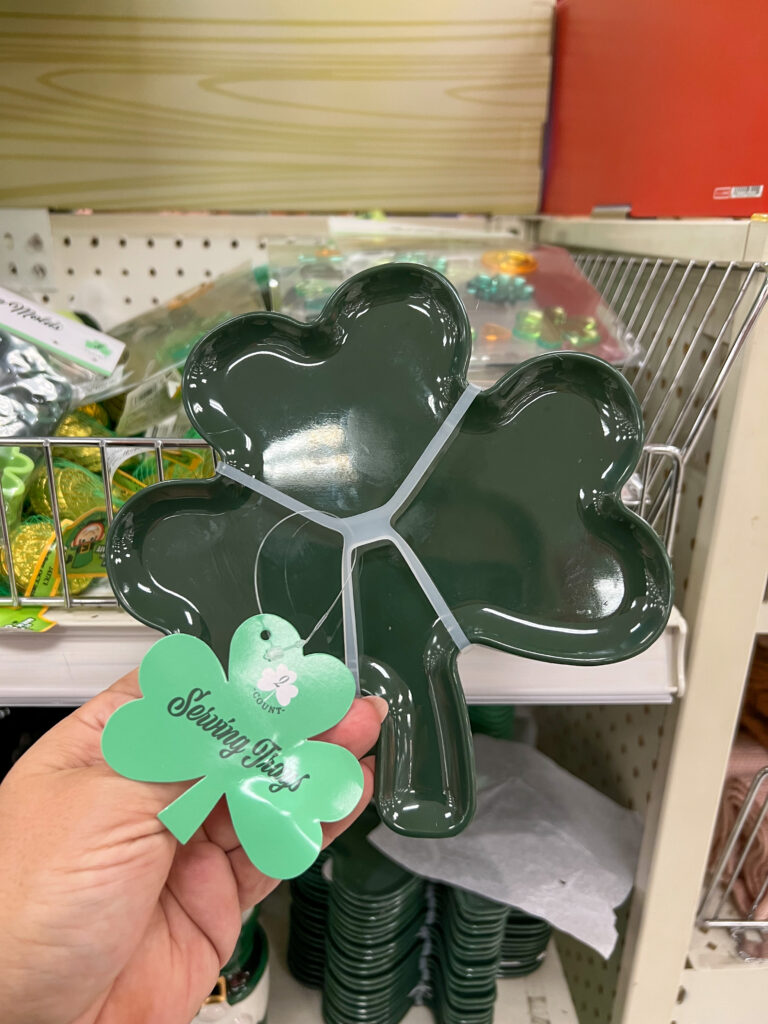
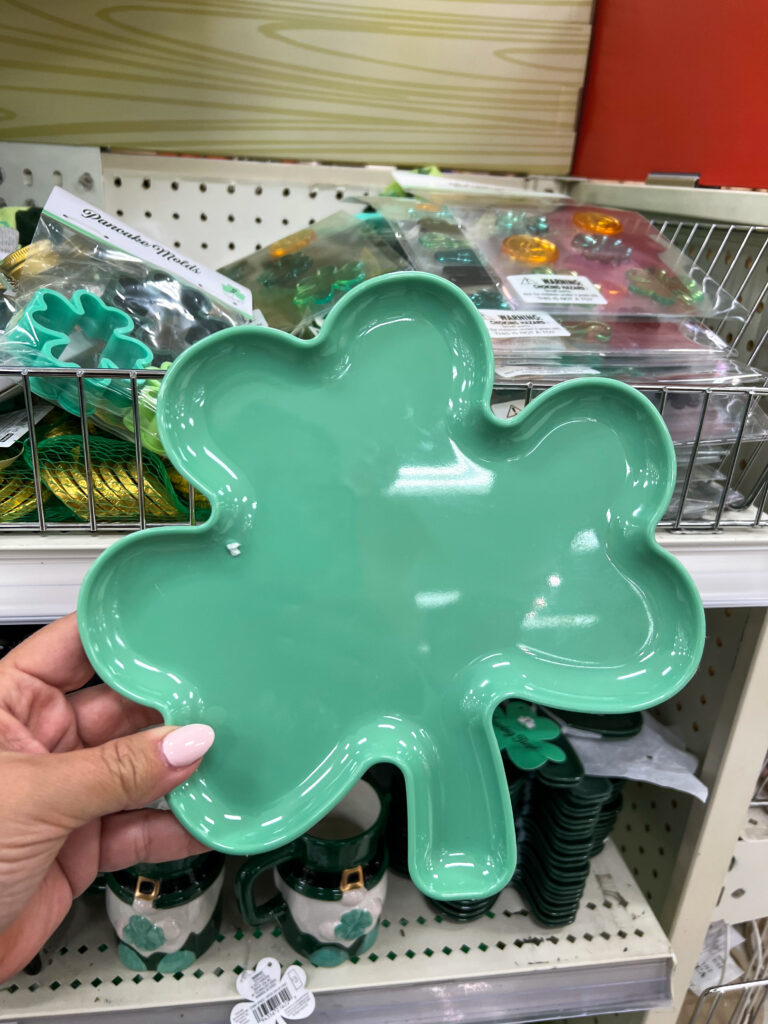
They also had a few selections of St. Patrick’s Day dishware. The dark green clover dishes would be cute for candy wrapped in cellophane for gift-giving. I nabbed the lighter green larger ceramic plate for clover cookies. I also grabbed a package of clover pancake molds. OK, I thought they were cookie cutters until I got them home. But, I’m going to try to use them that way because I like the three size variations.
They also had window clings, chocolate coins and a nice selection of adorable St. Patrick’s Day socks. I found a great variety of really fun items at the Issaquah, WA store. What did they have for St. Patrick’s Day at your store? If you thought St. Patrick’s Day was good at your local Target, wait until you see what’s in store for Easter! Oh my.
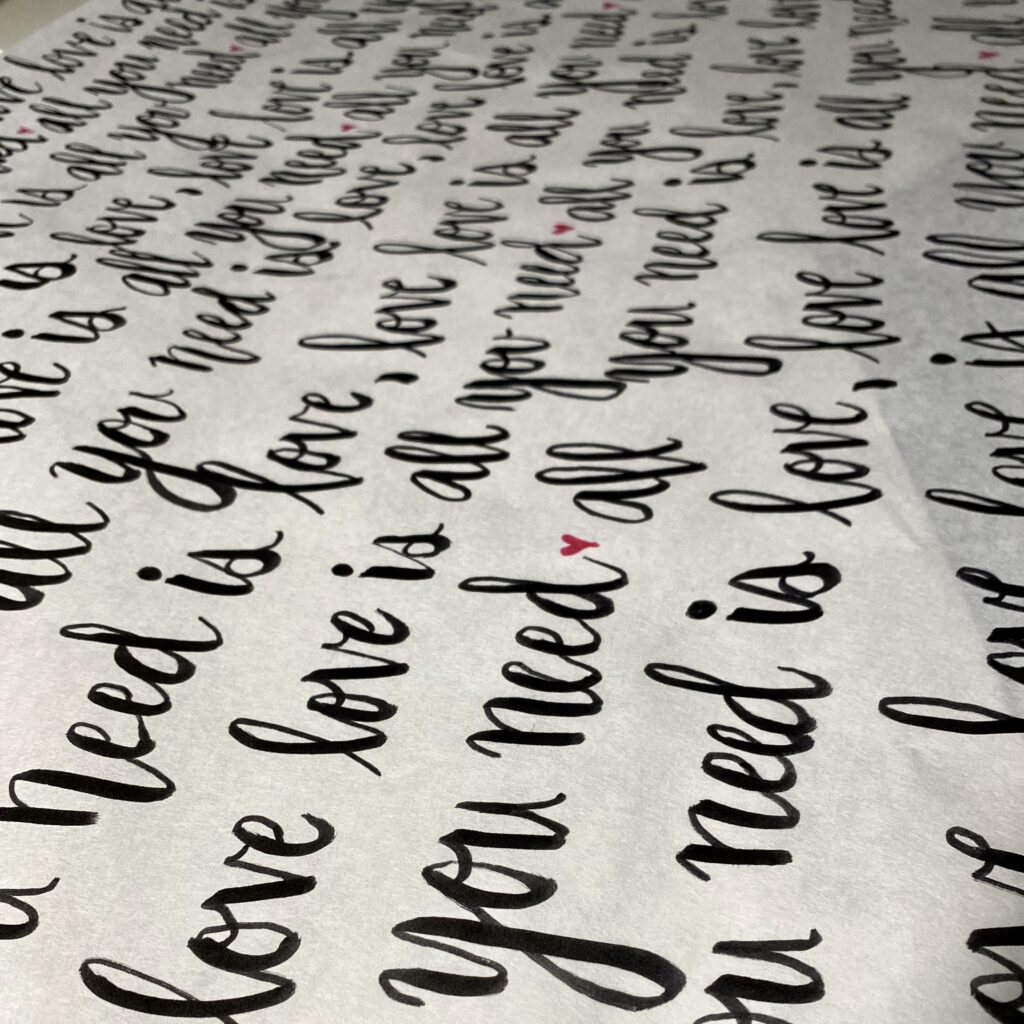
I was in a pinch for wrap for Valentine’s Day, so I made this cute wrapping paper from white butcher paper from Amazon. I had purchased it on a whim, thinking I was going to do something clever with it someday and it was perfect for this cute and quick solution.
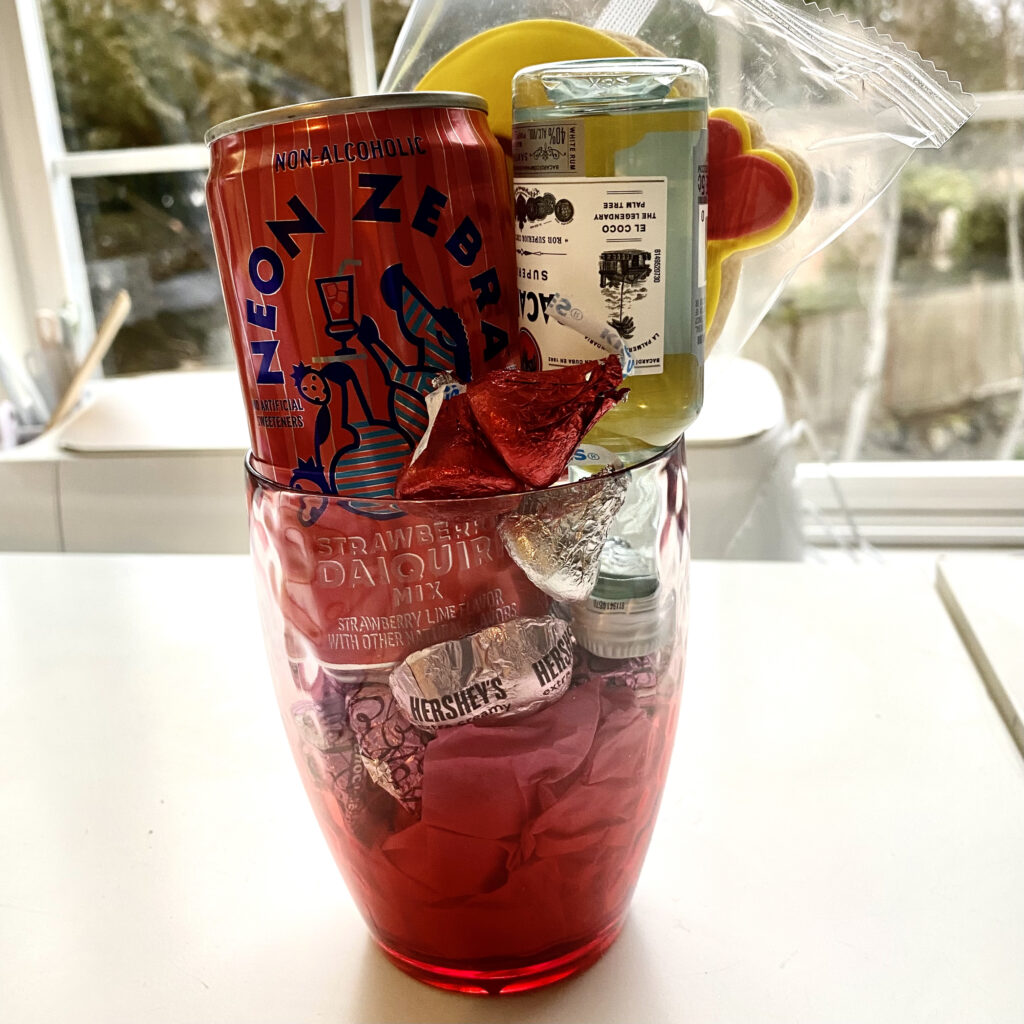
I actually used it for the outside of a package I mailed to my daughter and put a mailing label on it. She said it arrived intact and was a sweet surprise. Inside were these little cups filled with a mixer, mini bottle of rum, cookie and candy. The perfect gift for a twenty-something!
For me, February 14th will just be me and my furry Valentine, a glass of wine and Netflix! Happy Heart day however you celebrate!
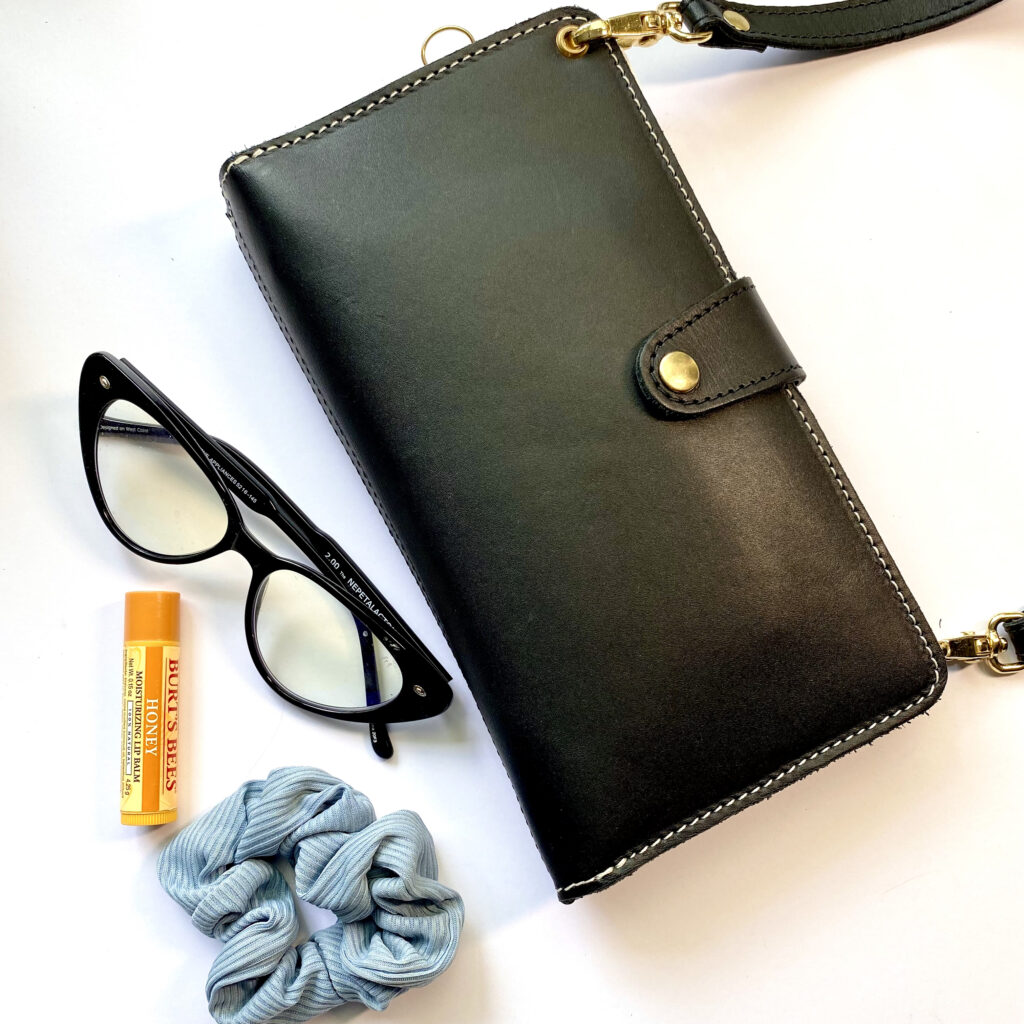
I’ve been searching for a new wallet that will allow me to plan on the go. I’ve found that I spend (and waste!) a lot of time waiting for appointments, picking up my kids, and killing time between meetings at coffee shops (I’m looking at you, Starbucks). I wanted something small without being too bulky. What I found was the Planner Perfect Everyday Traveler’s Notebook wallet. It has a detachable strap to be worn as a crossbody bag, or it can be used simply as a wallet or traveler’s notebook. I thought it would be perfect for using every day or for travel documents while traveling.
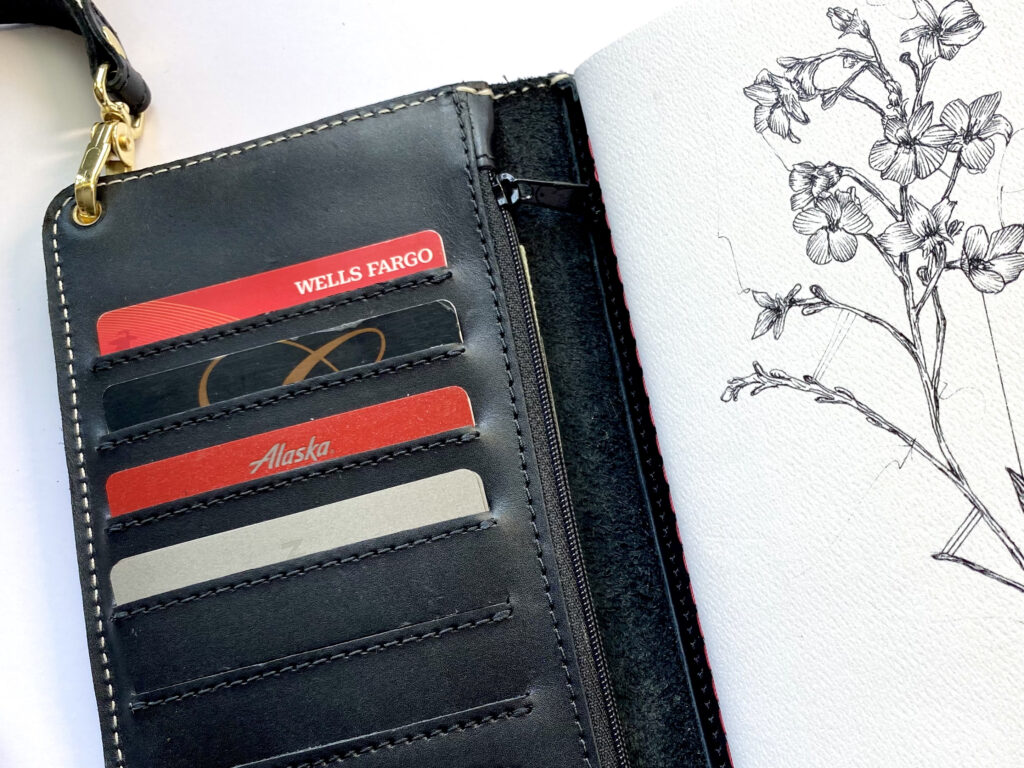
I’ve been using my Everyday Traveler’s Notebook wallet for about a month and think I’ve really settled into it. It functions just like a wallet, except I have two notebooks that I can use for meal planning, shopping lists, daily planning and schedules, doodles, or project tracking. The front left panel includes 6 slots for cards, including one for identification or driver’s license. Behind the card slots, there is a zippered pocket for change, valuables, or a passport. Behind that is another pocket for bills and receipts.
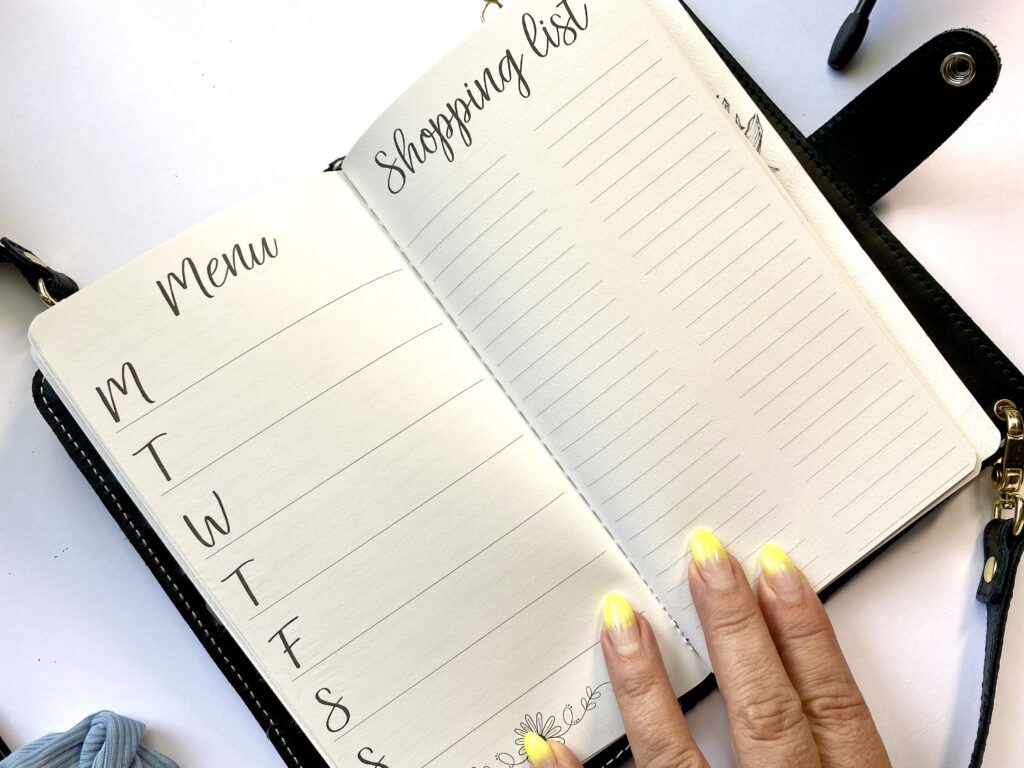
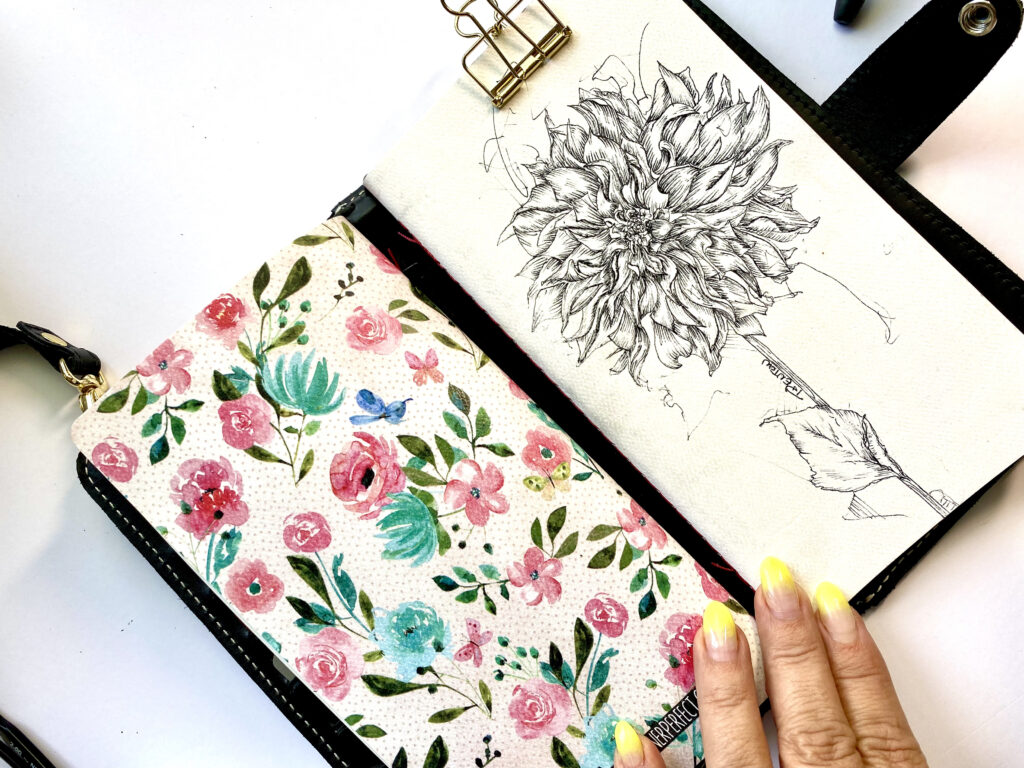
Two elastics secures the notebooks, and there is a wide range of themes and formats available through Planner Perfect. They are sturdy with thick covers and contain 40 sheets/80 pages of 24 lb. journaling paper that will hold up to watercolors, paints, and ink. For my first notebook, I selected a meal planner and shopping list journal to help me plan meals throughout the week and keep track of what I need at the grocery store. The second notebook is a blank journal I use for project lists and daily planning. They both feature a minimalistic botanical illustration. There are a variety of options for cover artwork, most of which were done by the owner and founder of Planner Perfect, Jenny Penton.
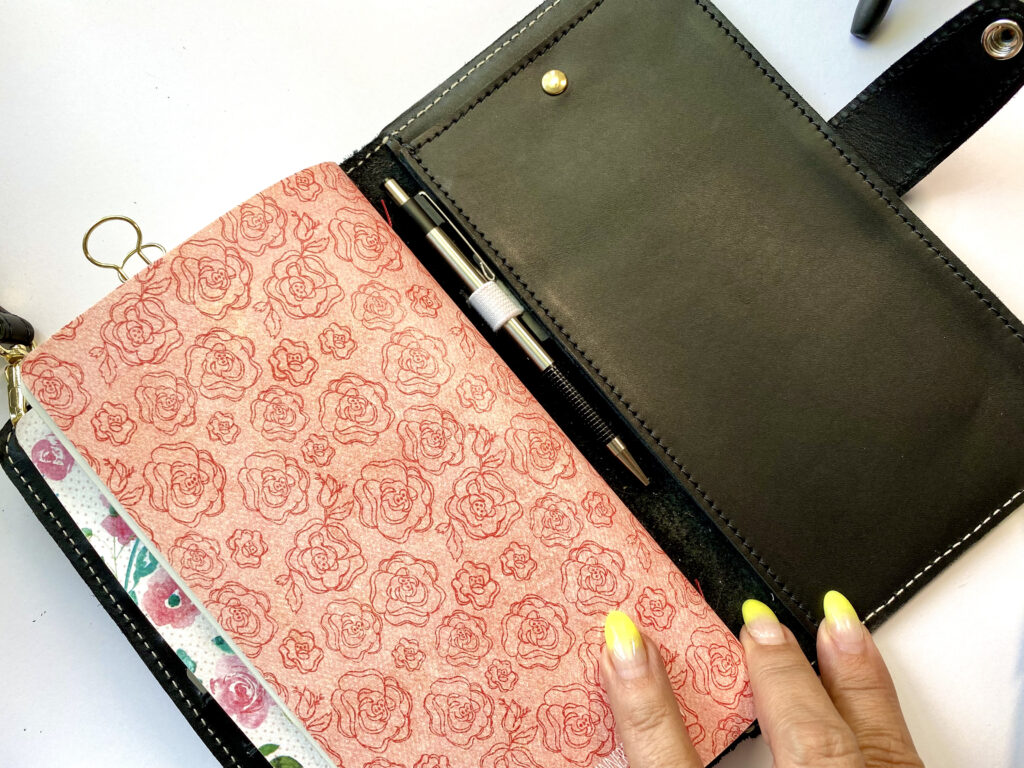
The back of the wallet features a long pocket that is secured by a gold-tone snap. I use this pocket for my iPhone 11 Max Pro. It’s a large phone but fits securely in this pocket. I added a pen loop because I like to keep my favorite pen handy, but many use the snap pocket for holding pens and pencils. There is an additional pocket behind the snapped pocket that can be used for additional paperwork.
I think I have found a great solution for a wallet/planner combo and planning on the go. I’m excited to give it a go on some upcoming trips I have this fall! For a more in-depth peek at the Everyday Traveler’s Notebook wallet, take a look at my video review below!
Since I have moved into my Erin Condren A5 LifePlanner Ring Agenda, I’ve wanted to dress her up a bit. Please don’t ask me how much I’ve spent watching youtube videos for ring planners. It’s obscene. But I’ve been sucked into all the options for personalizing my planner. It has seriously opened up a whole new planner world for me. I experienced a planner funk during the pandemic (it’s been refreshing to learn that many of you have as well), and I have new enthusiasm and inspiration for planning.
There are so many cute shops that provide accessories for ring planners. I’ve really loved spending hours browsing Pepper & Jax, Cloth & Paper, Avant Agenda, Paper Panduh, and more. I think my planning style is changing, and I can’t wait to see where it ends in a few months. I wanted to collect some cute dashboards, charms, and cards to enhance my planner to celebrate that change. So I thought — why not make some of my own?
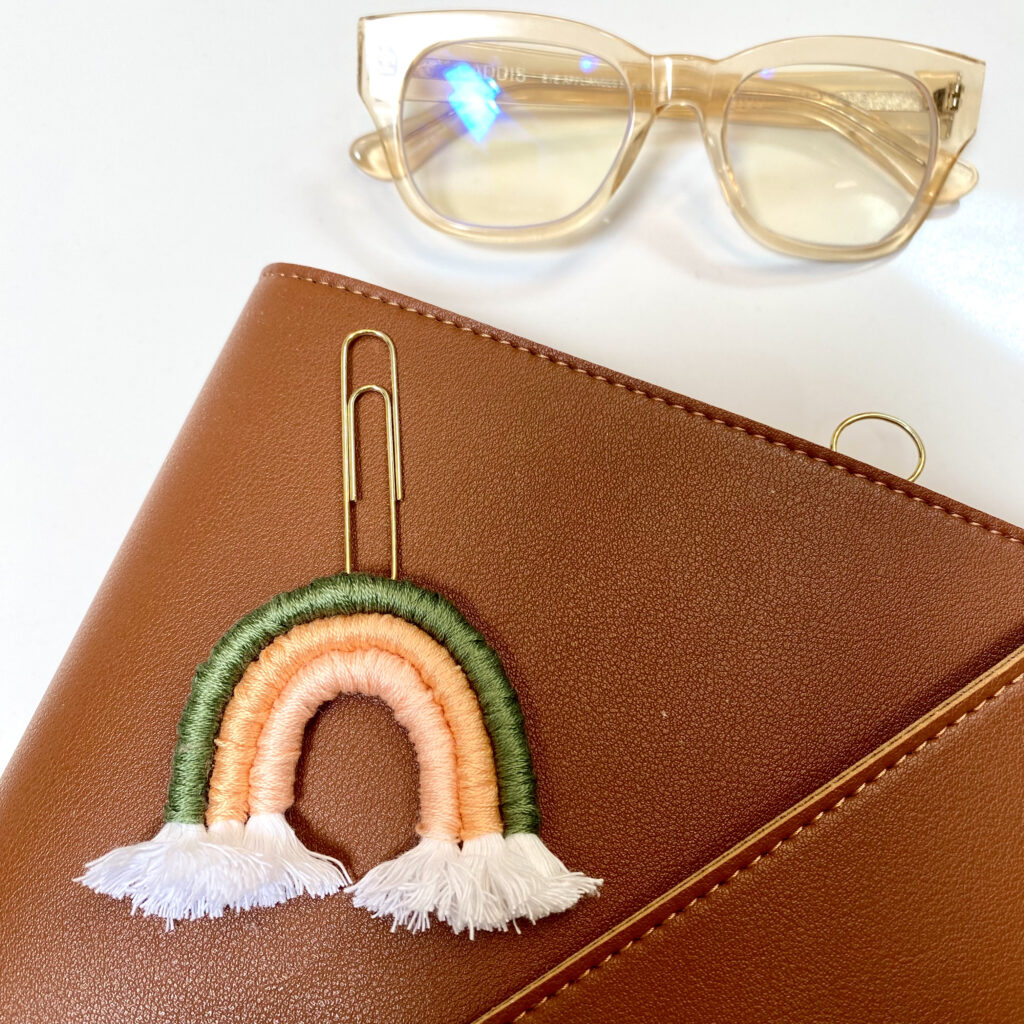
I’ve seen tutorials for these cute fluffy clouds as wall hangings, earrings, and other decorative pieces. So I thought they would make a super cute planner charm. In addition, I’ve been looking at these shades of peach and green for my upcoming August spread. I loved the way this turned out — it just makes me smile. And best of all? It’s super easy to make.
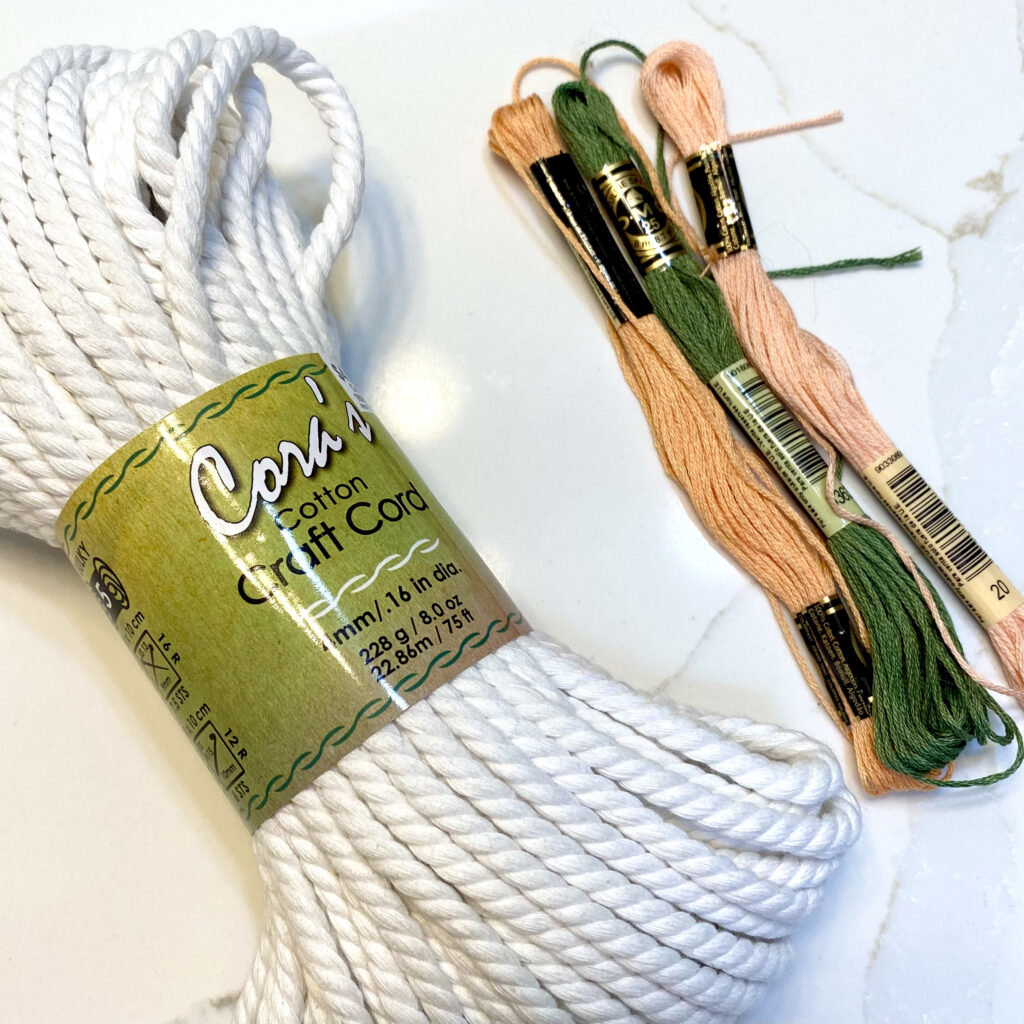
The supply list is pretty simple. You might even have most of it laying around the house:
Cut your cord to the appropriate lengths. I cut three segments and then bent them in the rainbow shape that I liked before trimming them to the same length across at the bottom. I also left them a bit long so that I could trim to my preferred length at the very end.
Tie off the embroidery floss to one end of the cord where you want the colored part to begin. Wrap each cord with the desired color of embroidery floss. Try to keep the wraps even and not overlap, keeping the wraps tight and even. I could have done a better job doing this, but I also think the uneven wrap gives it a cute organic look which doesn’t bother me.
Continue wrapping until the desired point at the end of your colored ray. Using a needle, tie off the embroidery thread by catching two or three of the previously wrapped threads and form a small knot that will rest on the back of the ray.
I was constantly bending each ray to test that I was ending my wrap in the appropriate place and adjusting accordingly.
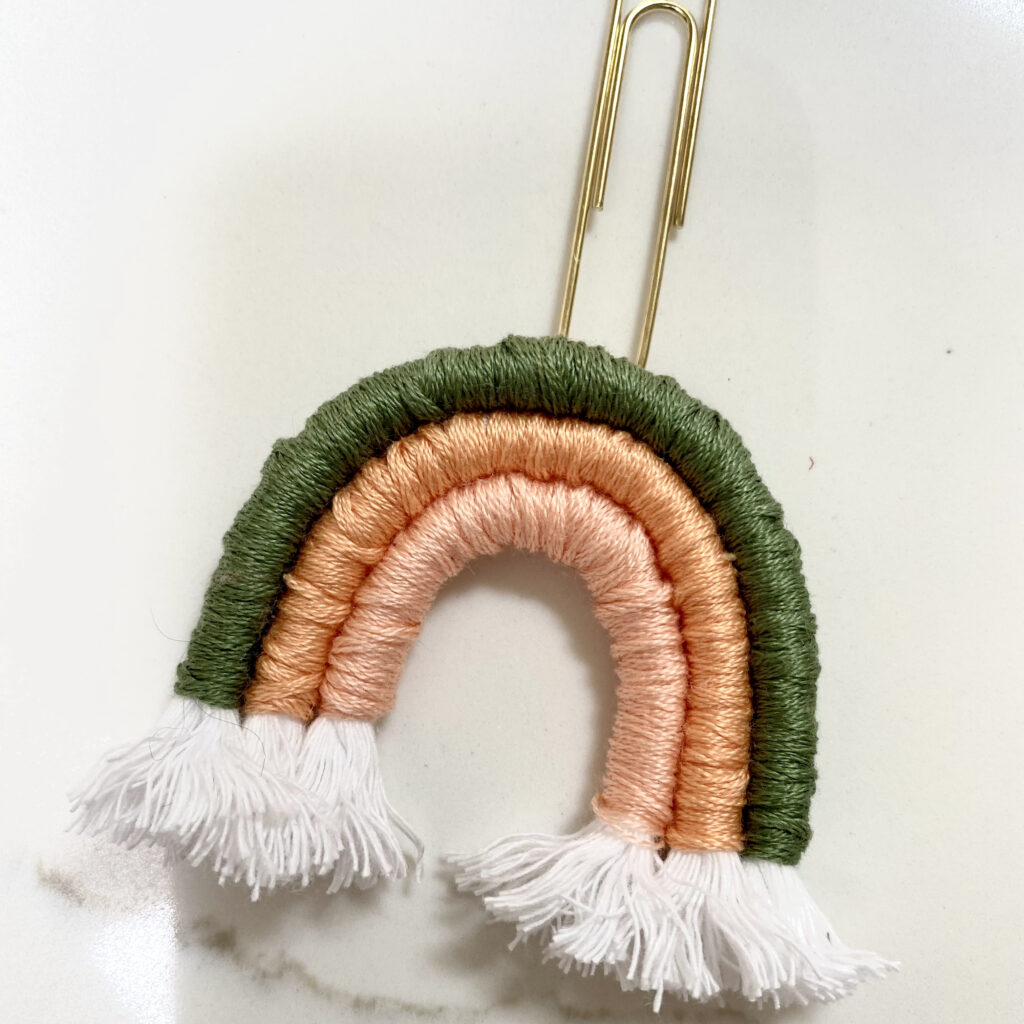
After all your cords have been wrapped, line up each ray and bend to the degree you like. Remove all but the first (bottom) ray and dot with glue around the sides. Make sure the dots are placed more toward the back of the side so that none squeezes about between the rays on the front. Press firmly together with the desired bend of the rainbow. I used super glue, which really secured each ray together and made it overall very firm and secure. Continue with all your rays until you have completed your entire rainbow.
Do a final trim of the bottom cord/end of the rainbow.
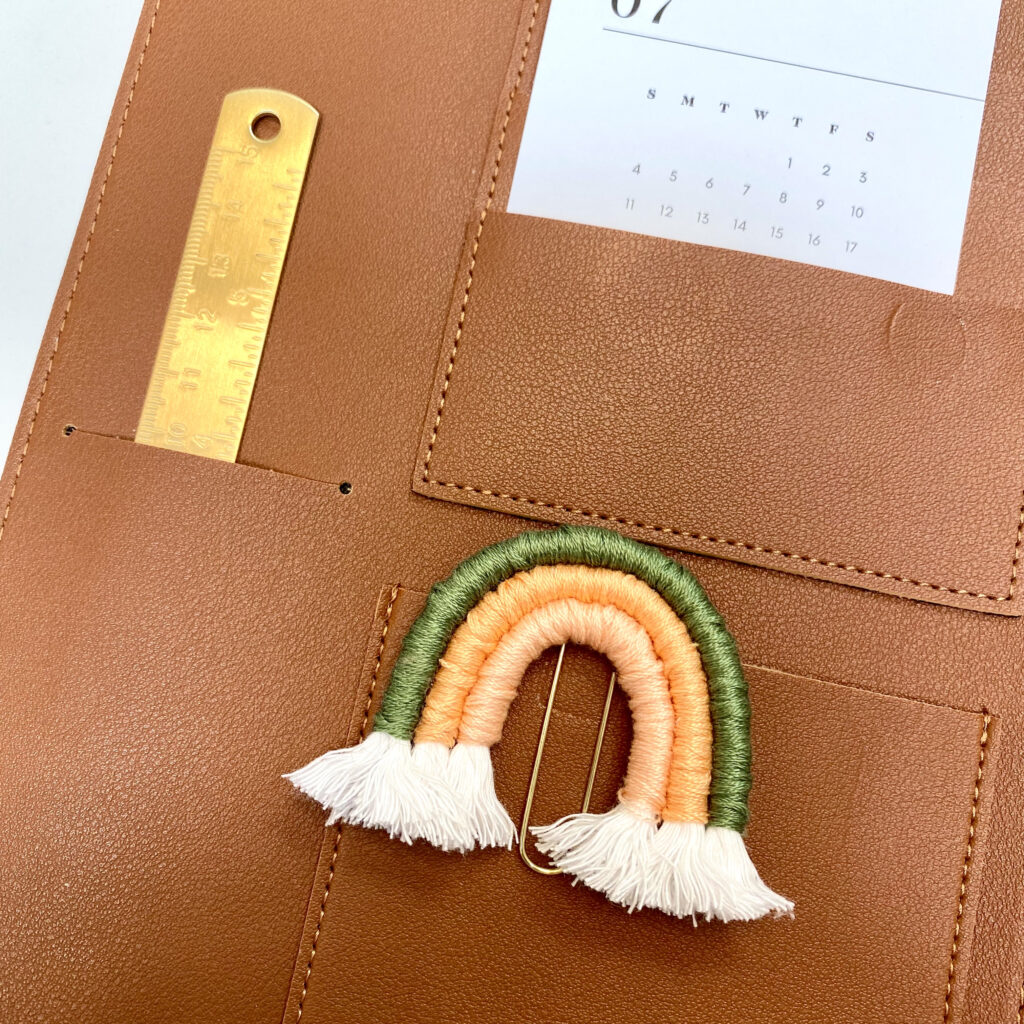
Take a piece of embroidery thread and sew your rainbow at the top to a paperclip, claw clip or some other accessory in your planner. I used a paperclip so I could decorate the pockets inside my A5 ring planner.
Enjoy!
This was so easy to make and made me smile when I open my planner. Plus, it’s going to coordinate with my August spreads. Join me in my August Plan with Me to see this little beauty featured!
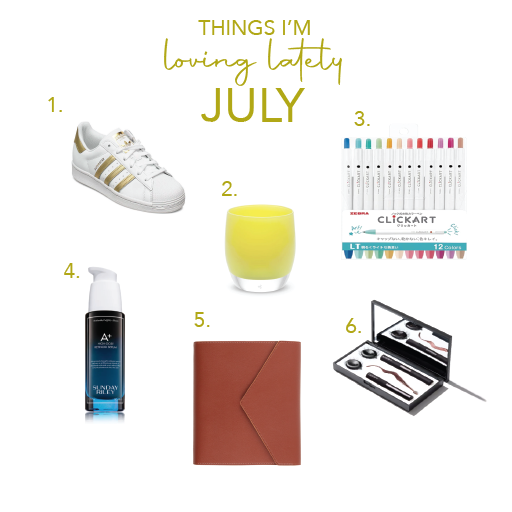
I love the Adidas Superstar sneakers in white and metallic gold. I saw them on a girl in the nail salon and fell in love. I’m slightly concerned they look too young for a fifty-something to wear — but do I really care? They do run big, though. I ordered my normal size and had to gift them to my daughter as I reordered a size down. (I’m sure she’ll stop wearing them once she sees them on me.)
The newest glassbaby is called Fearless. It’s just the right mix of yellow with a hint of green. Who doesn’t want to be fearless? The circle card (if you know, you know) says, “every person has a bright piece of their heart that’s fearless.”
These ClickArt Retractable Markers by Zebra are perfect for traveling in planes, trains, and automobiles this summer. I always drop my caps on normal markers making it difficult, not to mention slightly embarrassing, to pick them up on public transportation. These are the perfect solution to the problem. With a .6mm bullet point tip, they’re perfect for planning or doodling.
I completely neglected my skincare during the height of the pandemic. I’m pleased to say I’m back on a solid nighttime routine, and this A+ High-Dose Retinoid serum by Sunday Riley is featured front and center. My skin has recovered from the nearly year-long neglect and feels better than it has in a very long time.
I ditched my old coil-bound planner in July for the new A5 LifePlanner Agenda by Erin Condren. I think it looks professional while still holding all my important notes and calendars. I have high hopes for this ring binder in 2021! (Cheers to finally having things to plan!)
Lashify seriously saved my self-esteem during the pandemic. I might not have showered every day and may have worn my favorite comfy lounge pants more often than I should have — but damn, my lashes looked gooood. And I didn’t have to risk Covid-19 while getting extensions either. (Sahara Lotti, you’re my idol.)
July is here! While I’m excited about the 4th of July, I might be more excited to move into my new Erin Condren A5 Ring LifePlanner. I’ve waited patiently to start using this baby and the time is now. Join me and see my move in and July Plan With Me. Enjoy!
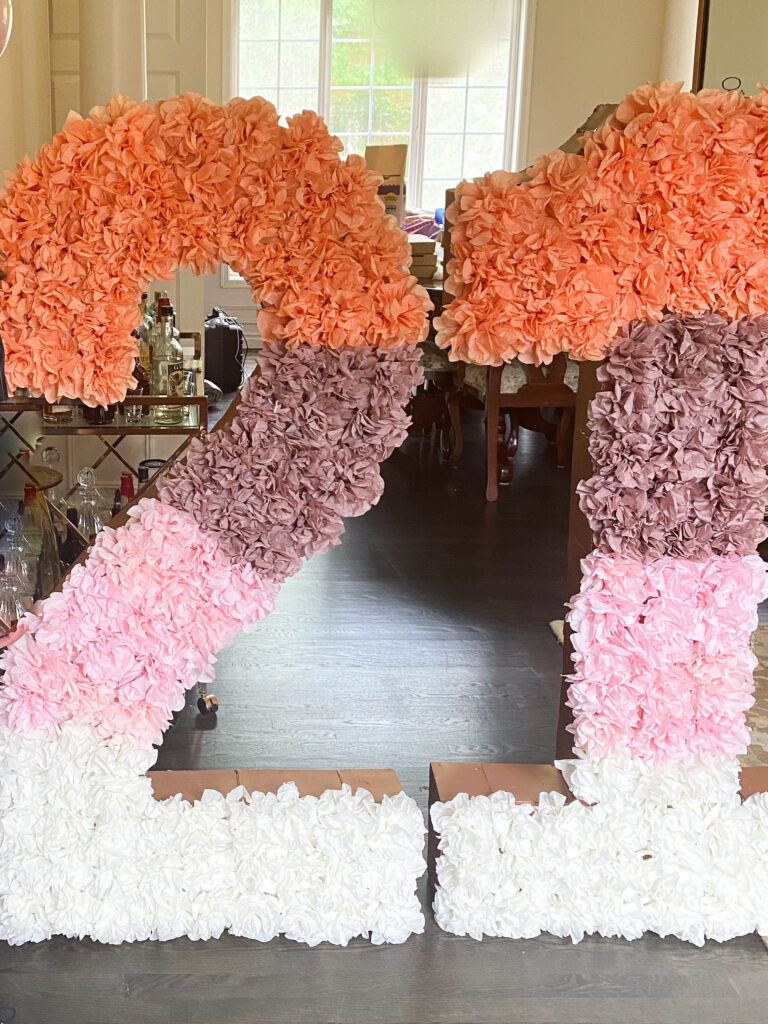
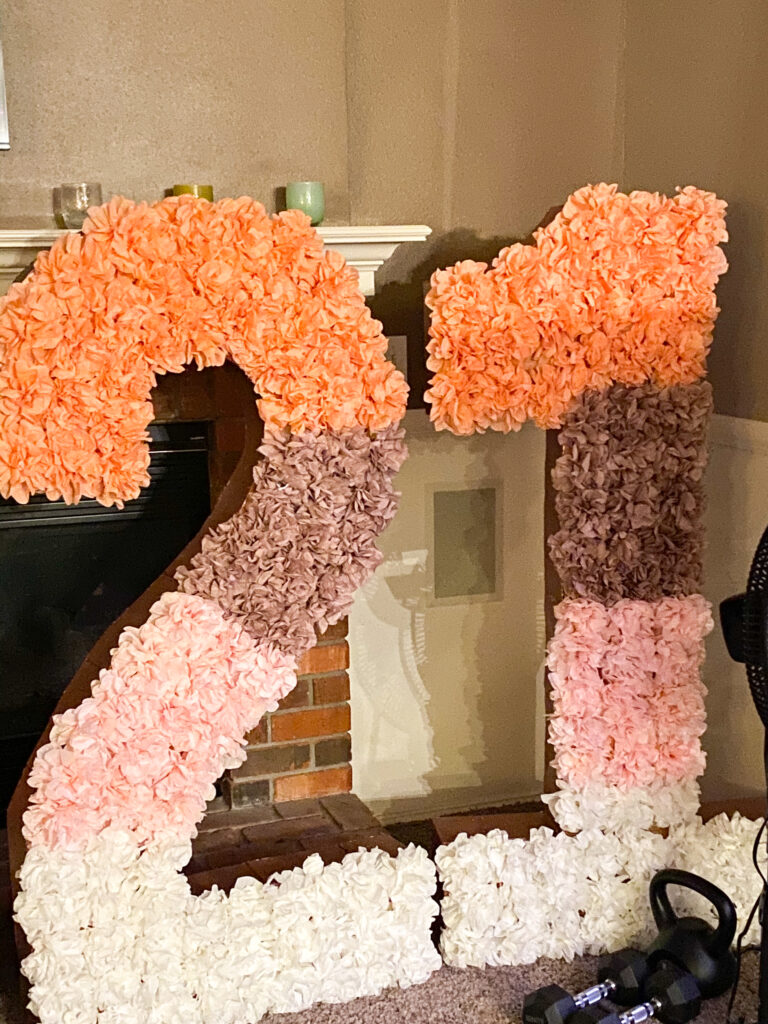
One of the favorite crafts I made for the twins’ 21st birthday was these huge, ginormous numbers. They were so cute for a photo prop and really made our celebration feel special. The best part was they were really easy to make and cost me less than $30 with materials found mostly around the house. Compared to the $200+ for party rentals, I thought it was quite a bargain. Also, I like to play with scale and gravitate to large items that make a significant impact in photos. These were a hefty 5′ tall, however, this project could be done on a much smaller scale requiring even less time and money.
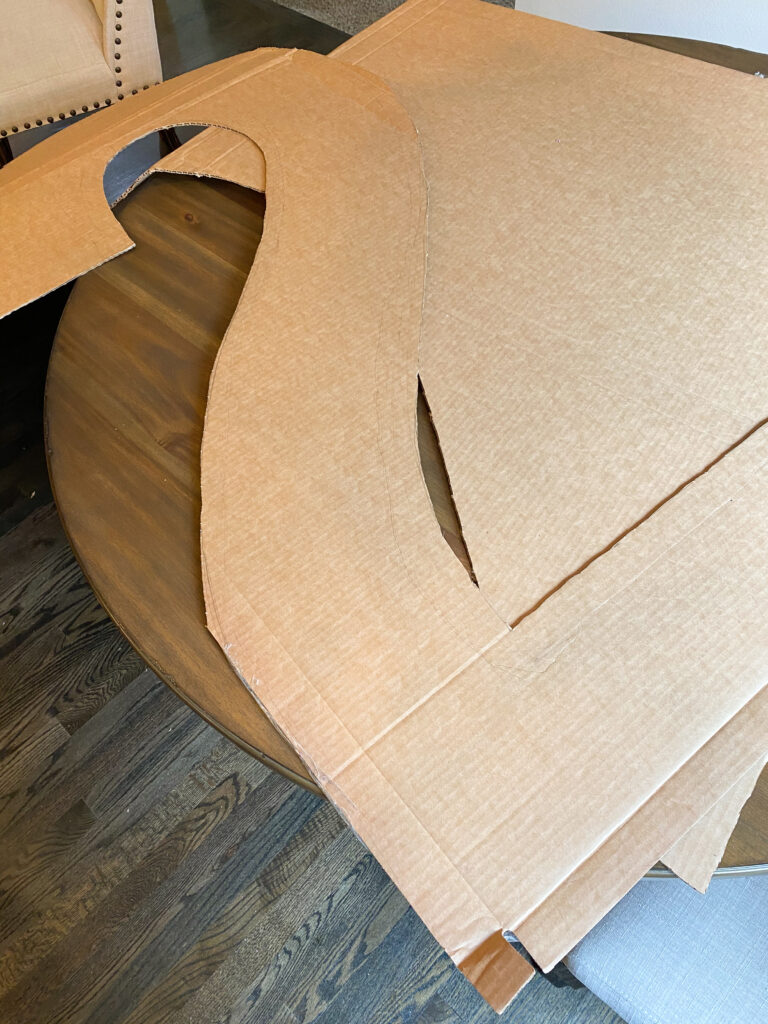
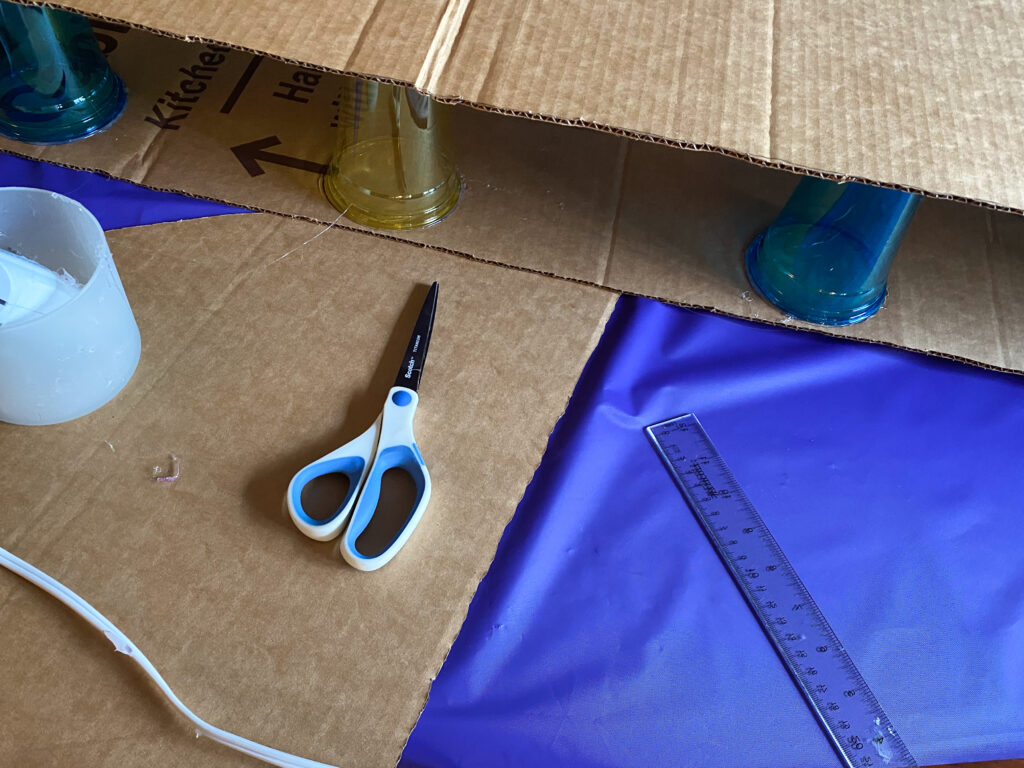
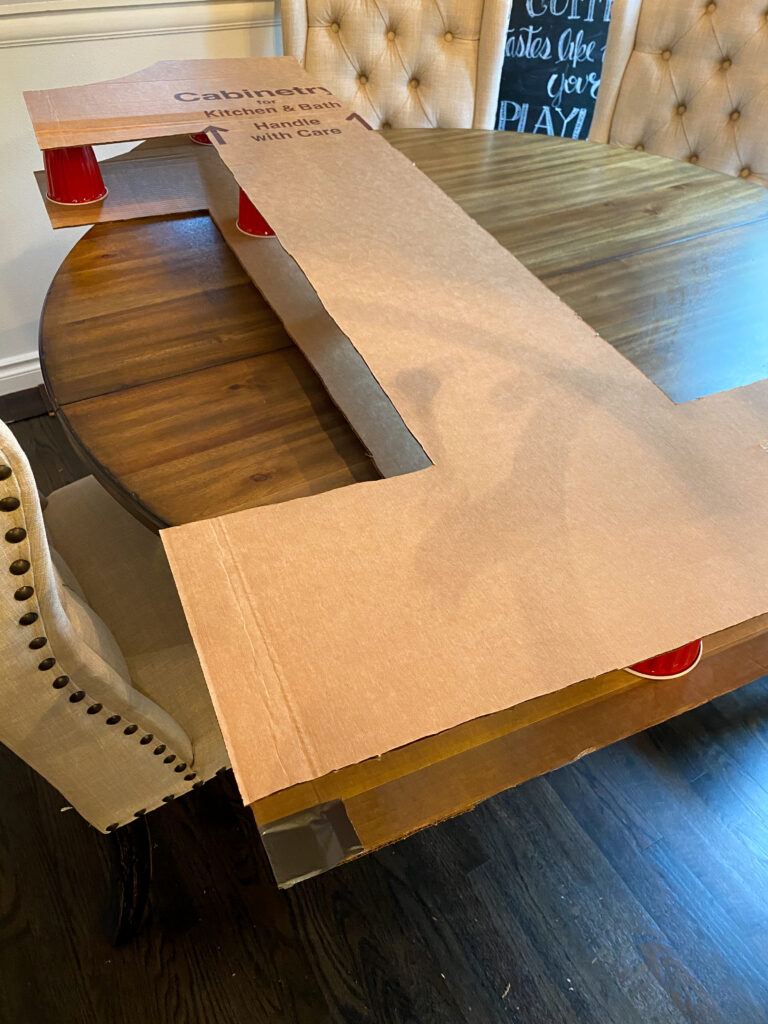
I started with some leftover cabinet boxes that my friend June had access to. Thank you, June! Some were folded but I tried to use the straightest pieces, knowing that a few folds would not be a big deal because the entire panel would be reinforced later. I sketched out the approximate width I wanted for the numbers with two pencils duct-taped to a ruler. (Don’t laugh. I’m sure you could use a special tool for this. Maybe a compass? But I used what I had on hand.) With a ruler, I then evened out the shape of my numbers and cut them out with a box cutter.
I then used solo cups we had on hand to stabilize the panels, allowing the numbers to be free standing and moved to several locations. I glued them to the bottom of the panel anywhere from 6 to 12 inches apart, depending on the shape of the number and areas that needed to be more sturdy. I then applied glue to the tops of the cups and carefully aligned the panel and placed on top.
To seal the sides, I used plain 100 lb. cards stock I had on hand. I buy this cardstock on Amazon to use for a variety of projects. It took about 30-40 pieces of card stock trimmed to the exact width of the numbers. I used my hot glue gun to get a nice seal on both sides. Be careful though — hot glue gun glue is very hot.
After the sides were sealed I made sure each number could stand on it’s own independently. I had to make some very slight adjustments to the bottom of one number to make sure it would balance properly. After the numbers were fully sealed (I didn’t seal the bottom though), I took them outside and spray painted them with rose gold metallic spray paint from Hobby Lobby. I knew I was going to cover the front with tissue paper flowers, but I wanted the edges and back to have a neat, professional look as well.
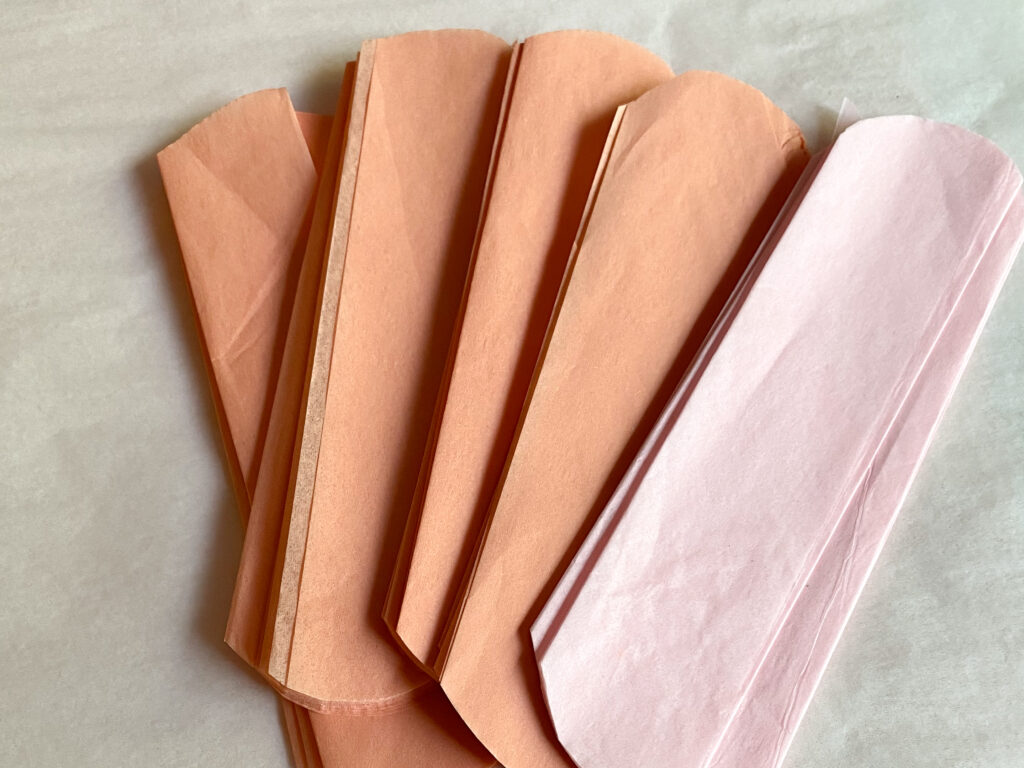
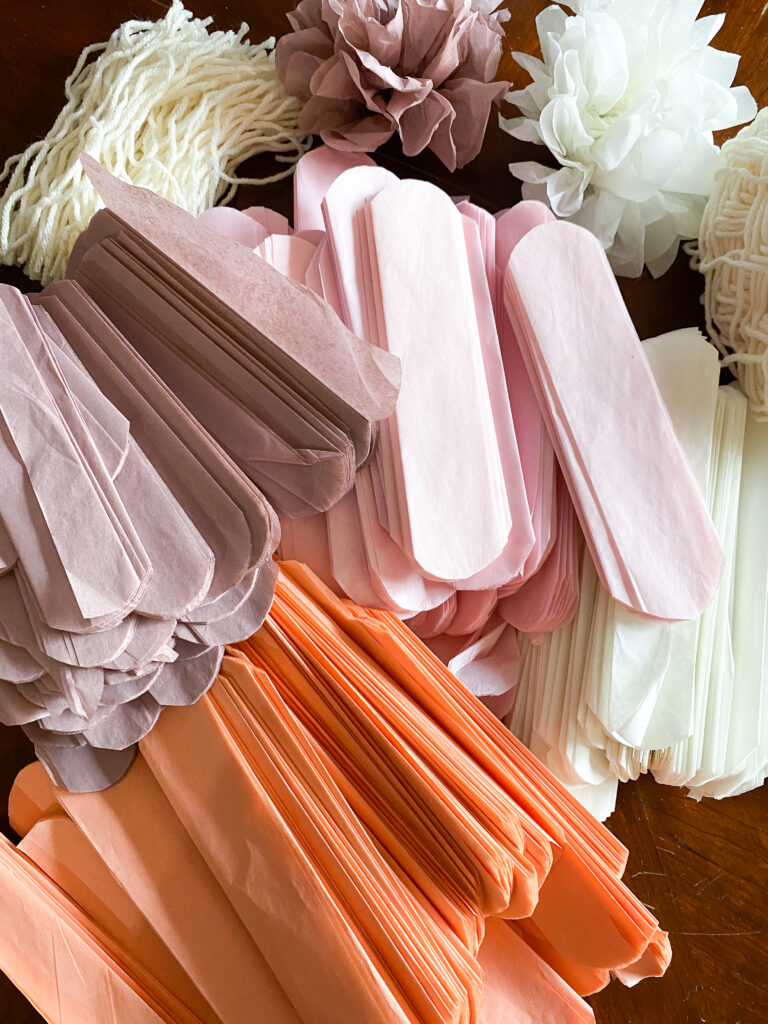
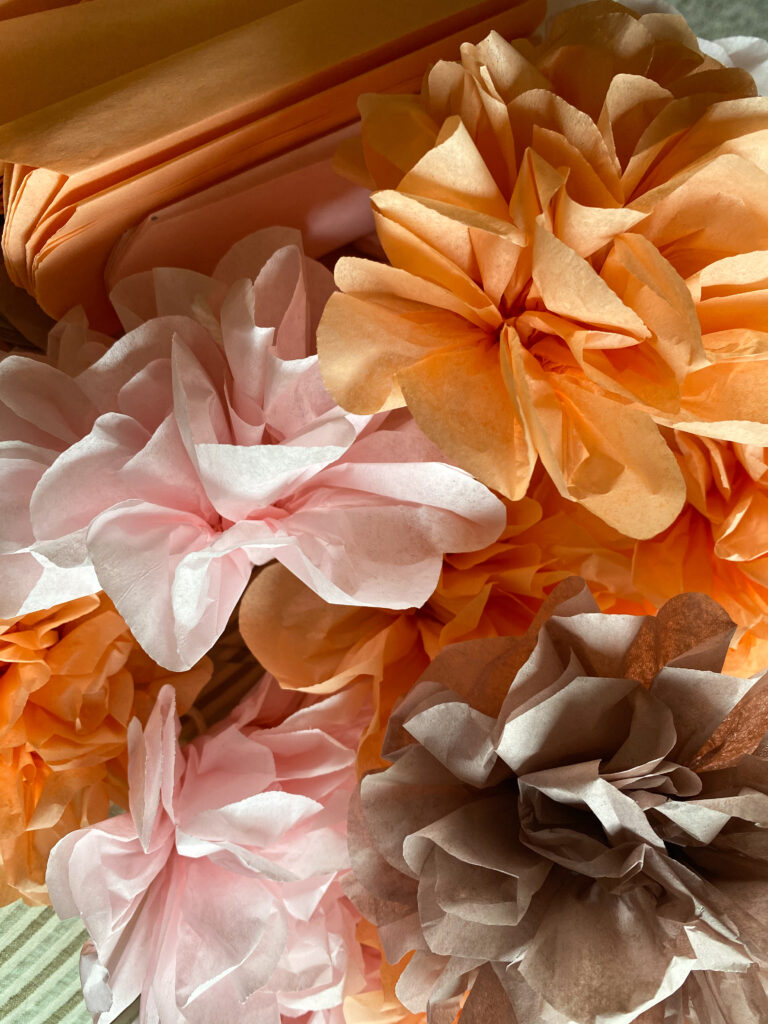
For the flowers I attached to the front panel, I used four colors of tissue paper from Nashville Wraps. Nashville Wraps is my favorite source of tissue paper for gift wrapping and crafts. They have so many really interesting colors and you don’t have to buy in extremely large quantities. It ships quickly, too! The girls’ party would use the colors off white, pale pink, light peach and rose gold. So I wanted to use those colors in the numbers as well. Making the flowers to be attached was absolutely the most time consuming part of making the giant letters. Luckily for me, we were binge watching Game of Thrones at the same time, so that made the mindless assembly of some 200 flowers a little easier.
I wanted to make my tissue paper go as far as possible so I used one full sheet of tissue paper to make two flowers (See? I told my husband I was thrifty.) I folded one piece of paper in half and then folded it accordion-style all the way down. I cut it in half and then rounded the edges of each piece.
After I folded and trimmed all the pieces I cut a large stack of of 5″ to 6″ pieces of yard I had laying around the house. You could use string, heavy thread or even wire. Then, one-by-one, I tied the piece of yard tightly around the middle of each folded piece. After secured in the middle, I pulled apart the tissue paper, fluffing as I went. Repeat. Repeat. Repeat. (Oh, Jon Snow, you made this process much more enjoyable.)
I ended up with piles and piles of flowers. Rather than randomly affixing the colors, I decided to use a stripe-like pattern. An ombre of colors would also be really pretty. I use a hot glue gun again to affix each flower to the appropriate section of the number.
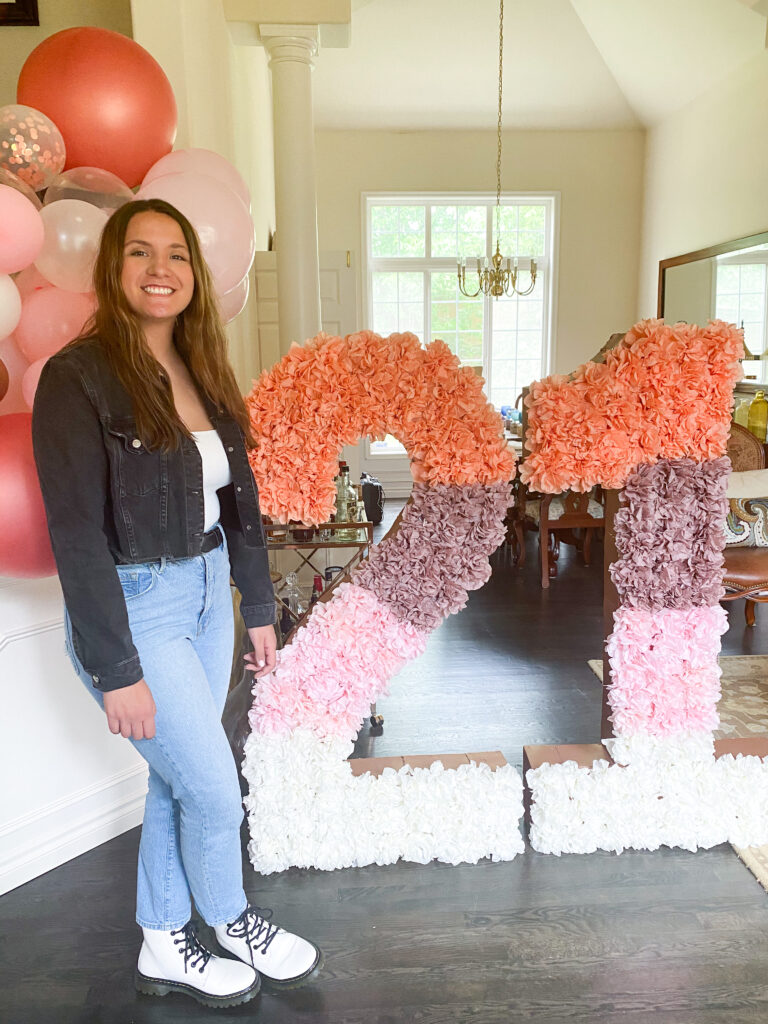
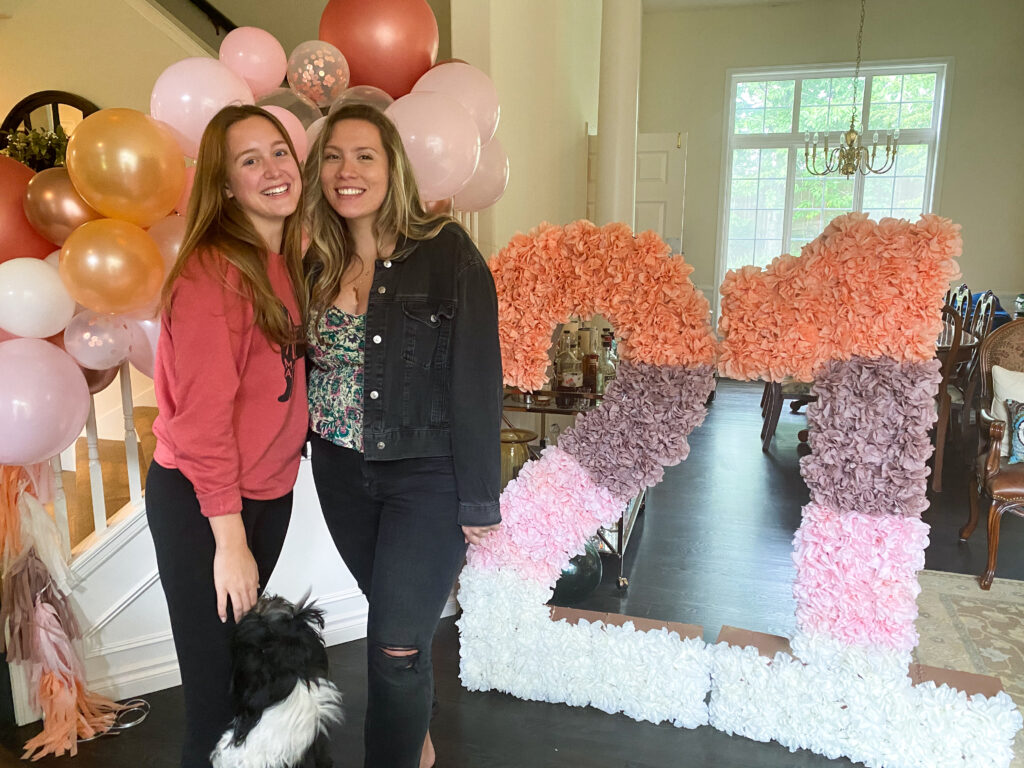
I think they turned out adorable and the girls and their friends were excited to take photos with them. They even made their way to their birthday weekend getaway several days and several hundred miles away. They were light and easy to transport in a small SUV. I think this same process could be used to create giant names for a baby shower or using only one panel to create a number or letter framework to hold a variety of sizes of balloons.
When the giant tissue paper numbers arrived back home, they were donated to a young girl graduating from high school for her graduation party. Class of 2021! What a great way to recycle and share the gift of crafting!
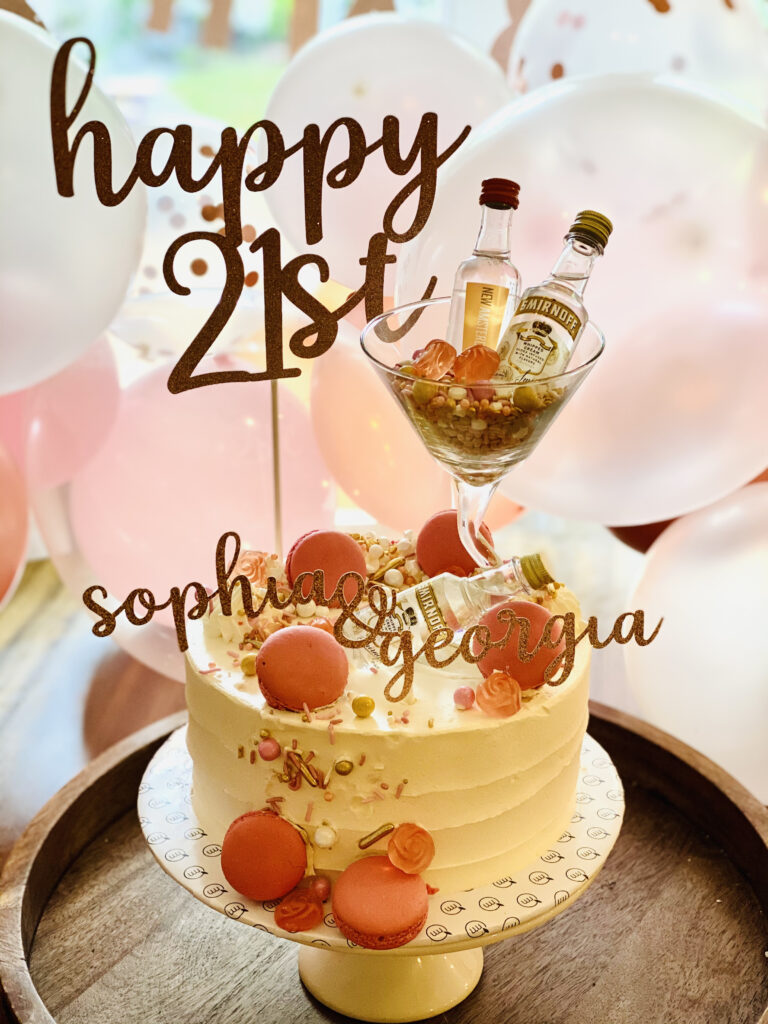
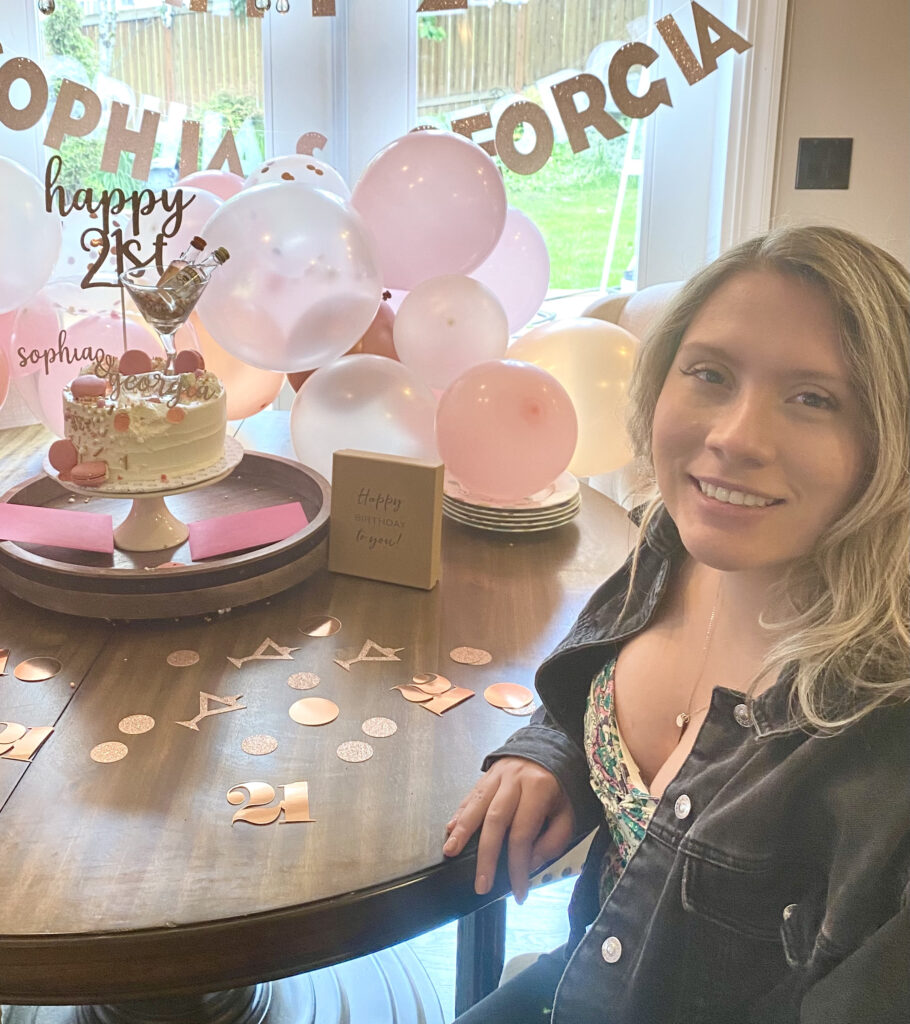
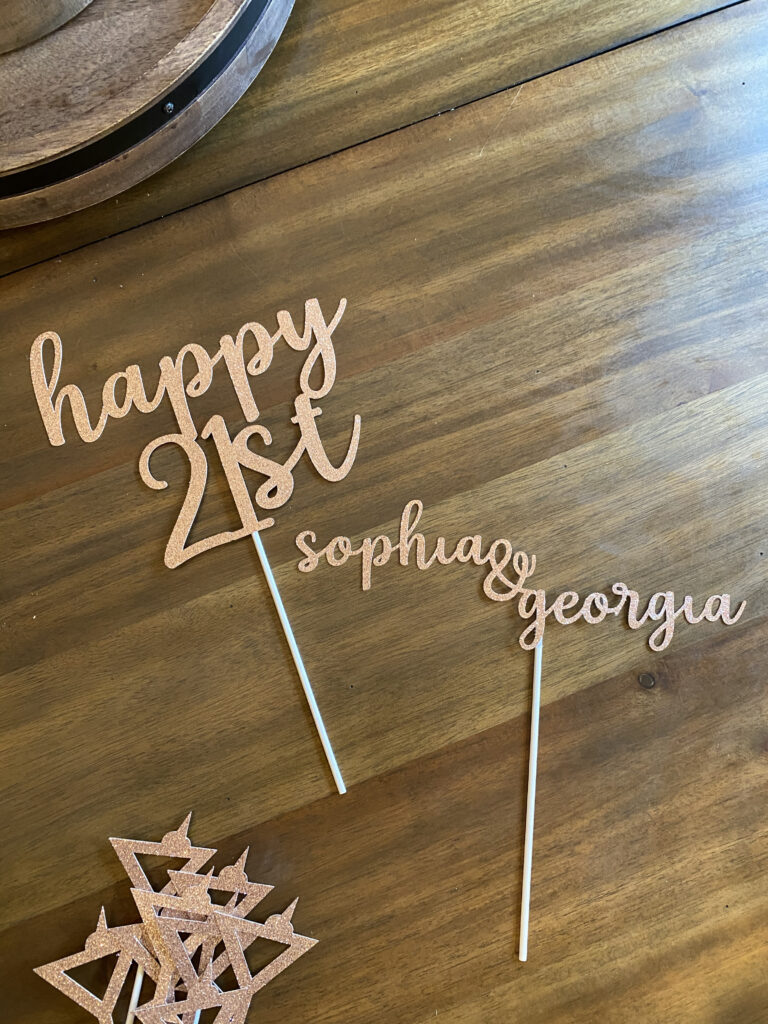
We had so much fun celebrating the twins’ 21st birthday. And can I say how great it is to be able to go so many more places (read: rooftop bars, wineries and breweries) with my now-adult children? One of my favorite projects I did for their birthday celebration(s) was their 21st birthday cake. It turned out so cute and was really affordable compared to other cakes. The crowing glory on the cake was the 21st birthday cake topper I made with my Cricut Maker. Ok, well that and the martini glass of vodkas!
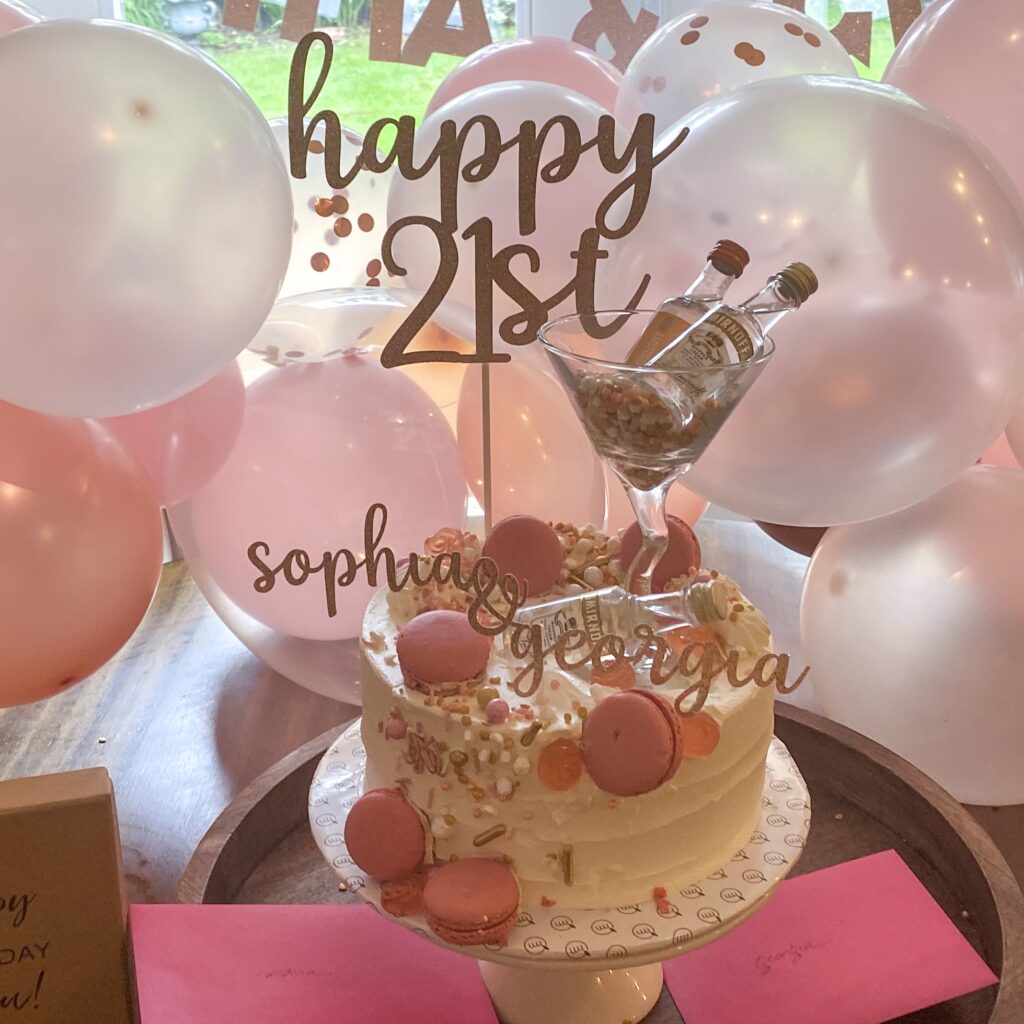
I started out ordering a plain cake from Metropolitan Market, a great chain of stores in the Seattle area with a terrific bakery and lots of great items. I asked them just for the basic cake. (“No, I don’t want the sprinkles. No, please don’t include the frosting flowers. No, I’m sure. Just the cake and the base frosting with ridges.”) I then purchased a variety of pink macarons and different sizes of sprinkles from Michaels, Hobby Lobby and some online stores.
For the top of the cake I bought a 9 oz. martini glass from BevMo. (You’d be surprised how hard it is to find anything smaller than 12 oz., including at our house. Must be the pandemic.) I simply added some sprinkles to the glass and added in some small airline bottles of vodka. Then I randomly smooshed in the macrons and sprinkled with my mix of interesting sprinkles.
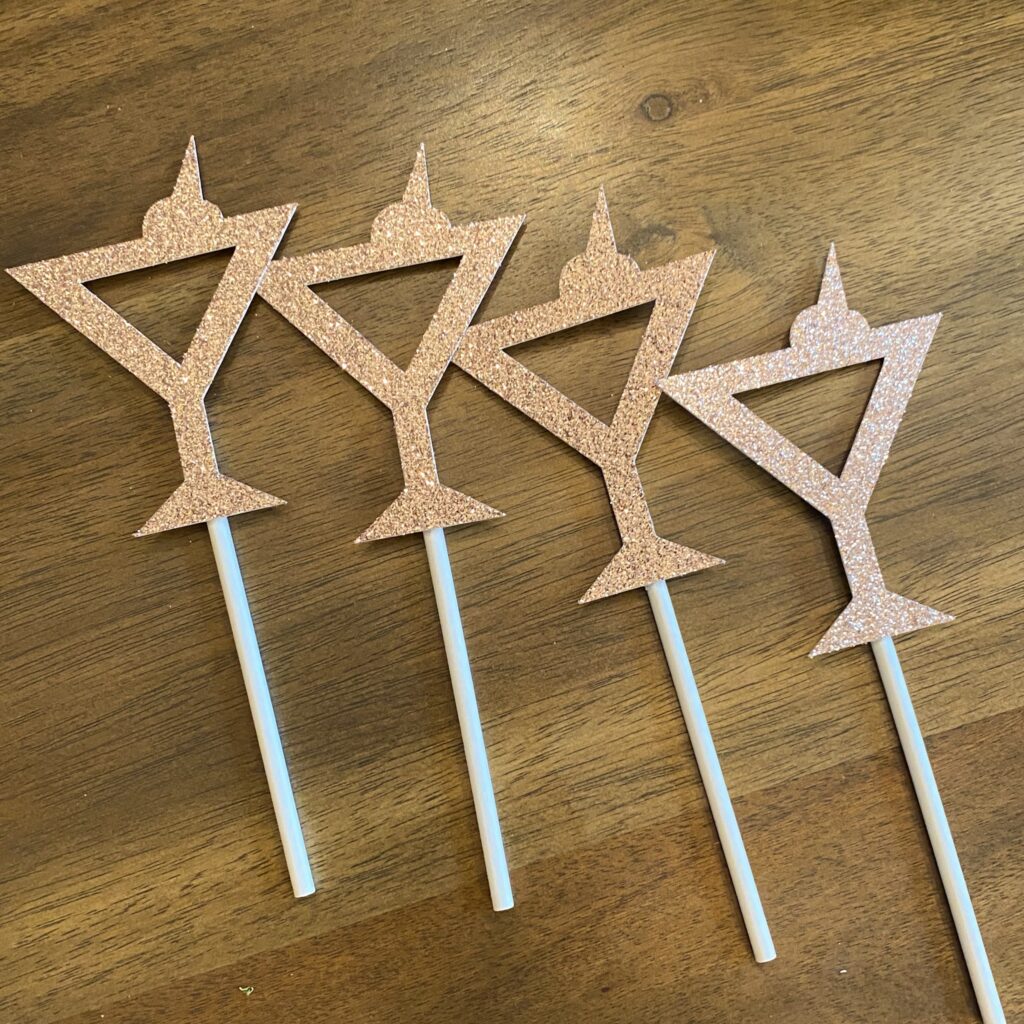
I also purchased some rose gold foil and cut out a happy birthday banner, some table scatters/confetti and some cupcake toppers for another celebration they had a couple of days after their birthday. (Darn it, I forgot to take pictures of the cupcakes – must have been too busy sweating and decorating.) For the cute 21st birthday cupcakes I did essentially the same thing and requested some plain pale, pale pink frosted cupcakes from the store. I then added the remaining sprinkles on top and inserted the cupcake toppers.
The combination of rose gold foil and glitter really made everything pop and festive. Such a simple touch to make a big impact to our celebrations!